Posted on Leave a comment

Sweet Potato Fries

I love fries…all kinds of fries…curly, shoestring, waffle, and especially crinkle fries!  If I could eat more fries without gaining a million pounds, I probably would!  My eating habits are a lot better than they used to be. I can remember coming home from the bar with girlfriends in college and we would fire up the “Fry-Daddy” and make chicken strips and fries as our 2:00 am late night snack.  Looking back at pictures from college, I am so bummed that I did not take better care of myself.  I gained 50 pounds in college and had such low energy.  I have learned better eating habits and how much happier I am when I am working out and feeling great!  (Don’t get me wrong, I still try to enjoy all the things I love…but only in moderation.) We have a beautiful trail by our house that goes throughout Olathe.  I love to go for runs and walk the girls on it.  Alex and I got bikes last week and have been going for rides and enjoying the fresh air!  Recently, I have been getting into yard work more.  Pulling weeds can be quite the workout if you are doing it right and its like hitting two birds with one stone!  Alex would love it if I would get out and mow but those things make me nervous!  I am better with a vacuum cleaner!

I am trying so hard to get a green thumb!  These are my sweet potato vines my Grandma Bloesser sent home with me and they are really taking off!
I am trying so hard to get a green thumb! These are my sweet potato vines my Grandma Bloesser sent home with me and they are really taking off!

Anyways back to sweet potatoes…I keep trying new things with sweet potatoes.  I used to be a pretty picky eater and lets face it people…they are ORANGE and were not something my brain could wrap around until Alex talked me into trying some sweet potato fries at Johnny’s down the street when we first started dating.  I found a new love!  So why can’t I make my own, more healthy ones at home?  Well that was what was for dinner Sunday night…and I am thinking about doing it again tonight!  Alex was impressed so he won’t mind!

Ingredients:

sweet potatoes

olive oil

salt & pepper

Instructions:

Start off with a few sweet potatoes.  I started with one and decided that was enough for two so the other one I will use later.  If I made 10, we would probably force them down because they are so delicious!
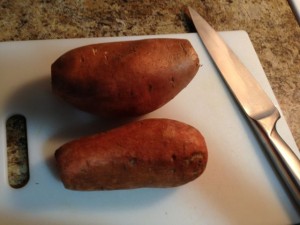
Preheat the oven to 400°.  Start off with a few sweet potatoes and cut into strips. I actually only ended up using one potato because they were huge.  I just needed enough for two!
Drizzle with olive oil, and salt & pepper on a baking sheet.
Drizzle with olive oil, and salt & pepper on a baking sheet.  Bake for 30-45 minutes or until cooked through.
Serve as a side with a juicy burger and enjoy!

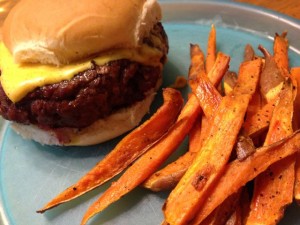
These turned out absolutely amazing!  I am almost positive I am making these again tonight because I have been craving them ever since.  Sweet potatoes are really pretty good for you as far as potatoes go!  If you haven’t tried one before, I urge you to check them out!  They are delicious especially dipped in ketchup…then again what isn’t good in ketchup?!


Posted on Leave a comment

DIY Monogram Wedding Gift


Here is the happy couple on their special day!  The wedding was absolutely beautiful!  It was outside and they could not have asked for better weather!
My friend Krista got married his weekend! Here is the happy couple on their special day! The wedding was absolutely beautiful! It was outside and they could not have asked for better weather!

I wanted to find a Pinterest idea that I could whip up for her for her special day! I wanted to monogram something for them with their last name on it to give it a little kick! I ended up finding te perfect glass baking dish with a lid at Walmart. The lid had a perfect canvas for a Monogram on it! I played around in Cricut Craft Room trying to find the best way to do the layout. I found some tutorials on YouTube that showed how to do a “split” letter but Cricut Craft Room has changed since the last update so I decided to do it my way! Instead of doing a split monogram, I did a giant M and put lines at the bottom with their last name in between. I was happy with the end result but that vinyl can be tricky when you have intricate cuts. I used Glad Press & Seal instead of transfer paper. I would like to get some transfer paper to see the difference but the Press & Seal worked ok. The biggest thing to remember while using vinyl is to make sure to carefully lay down the vinyl while making sure not to have bubbles in it. Originally, I planned on trying glass etch to put their last name into the glass pan, but since I am just starting to play with vinyl on my Cricut, I wanted to wait until I am more comfortable using it. I will have to try that on one of my glass dishes this summer to see how it turns out!

Materials:

Vinyl

Glass baking dish with lid

Glad Press & Seal

Instructions:

This is glass baking dish that I found at Walmart. The brand is Anchor.
IMG_0168
Cut the vinyl to desired design and size for the dish you are using. I used a ruler and figured out where my center was and marked it with a Sharpie. Make sure to really press the vinyl cutout face down with a tool before peeling away the backing.
After transferring the vinyl to the lid, make sure to push all air bubbles out. I had to pick up the vinyl a bit because I had air in it. I used my spatula tool to do this carefully.
After transferring the vinyl to the lid, make sure to push all air bubbles out. I had to pick up the vinyl a bit because I had air in it. I used my spatula tool to do this carefully!
Posted on Leave a comment

Parmesan Crusted Swai

I was busy pinning the other day…which is a total shock I am sure! Alex and I really enjoyed my Grilled Swai from last week. I was just happy to show him that HE was not the only one that could rock that Traeger! (Although I will say I was surprised that I did so well!) When I sat the fish out to thaw, I had originally planned on grilling it again…but I felt the need to kick it up a notch so I kept putting it off while I would decide what to do with it. Well, last night I decided to go for it. I found a few recipes on Pinterest that were baked with a breading and decided on Parmesan Crusted Swai! I just looked at a few and decided to modify them so here is what I came up with. But before I get to the recipe, I have to at least mention the side I made tonight.  Green beans are good but I am like crazy about green beans since Alex showed me how to sauté them! (I am even getting good at flipping them without stirring!)  I have always just turned on the stove and threw the can in…juice and all with a little salt & pepper and warm them up.  This was also delicious…but I could eat a can of cold green beans…they are just good!

Drain the green beans and toss in a little olive oil and salt & pepper and saute´ them for awhile.  They actually get an even better flavor after they have been cooked this way.  If you have never cooked green beans this way...TRY it!  You won't be disappointed...and you better leave me a comment about how it changed your life!
Drain the green beans and toss in a little olive oil and salt & pepper and saute´ them for awhile. They actually get an even better flavor after they have been cooked this way. If you have never cooked green beans this way…TRY it! You won’t be disappointed…and you better leave me a comment about how it changed your life!

Ingredients:

4 fillets of Swai or Tilapia fish 3 eggs 1 cup Italian Bread Crumbs 1/2 cup Parmesan cheese 1 Tbs parsley Salt & Pepper 2 Tbs melted butter

Instructions:

Start some butter melting in a pan.
Beat 3 eggs with some salt and pepper
Make your breading by putting bread crumbs, parsley, pepper, and parmesan cheese into a shallow bowl and mix.
Set up an assembly line with a greased pan to toss the breaded fish in.
Take the fishy for a dip in the pool.
Turn one side down into the crumbs pressing firmly to get it to coat well.  Do this on both sides.
Turn one side down into the crumbs pressing firmly to get it to coat well. Do this on both sides.
After both sides are coated, stick them into the stove for 15-20 minutes or until internal temperature is 160°.
It turned out amazing!!!!
It made a pretty bomb fish sandwich for lunch the next day!

Please let me know what you think!  I would love some feedback!  Savor Each Second!


Posted on 2 Comments

Daddy’s Stache

Yesterday I shared my Father’s Day project for my summer school kiddos. We finished them up today so they will be ready to send home tomorrow! I decided that I needed to get my own Father’s Day projects done and out of the door in time to be there by Sunday. (My Mother’s Day projects went out a day late since things were so crazy with school ending and I didn’t even get a picture of those!) So when I came home from work today I decided to finish them off. I had spent a few days rounding up all of the goodies to put in the jars and they were getting close. I finished up and got them in the mail today!

You can use all different types of jars.  I grabbed the big one for Troy and his HUGE sweet tooth!  I had to make it better then the big bowl that is stuffed full of goodies already!  This will keep it fresher and airtight!
You can use all different types of jars. I grabbed the big one for Troy and his HUGE sweet tooth! I had to make it better then the big bowl that is stuffed full of goodies already! This will keep it fresher and airtight!
For my daddy...I made him a "stache" of pistachios!  I can remember when I was little, we would eat pistachios together because he LOVED pistachios!
For my daddy…I made a “stache” of pistachios! I can remember when I was little, we would eat pistachios together because he LOVED pistachios!
This is Troy (or Troyboy....which is what I call him!)  He is my step-dad and he is addicted to candy!  This was by far the BEST idea for him for Father's Day!  He is worse than a 5 year old!  Every time mom and I go to Garden we always have to get Troy some candy!  They have the best "STACHE" of goodies when I come to visit!  Between my mom and my sister, I hooked him up with some Red Vine Red Licorice, Carmel Milky Ways, and some extra goodies!
This is Troy (or Troyboy….which is what I call him!) He is my step-dad and he is addicted to candy! This was by far the BEST idea for him for Father’s Day! He is worse than a 5 year old! Every time mom and I go to Garden we always have to get Troy some candy! They have the best “STACHE” of goodies when I come to visit! Between my mom and my sister, I hooked him up with some Red Vine Red Licorice, Carmel Milky Ways, and some extra goodies!  I will be honest….There was ONE more box that didn’t make it….it was delicious!  I owe you a box of Reese’s Pieces!  lol  I couldn’t resist!
Sorry Troyboy!  This picture kills me everytime!  He's awesome!  Best Step-Daddy a girl could ask for!  He does so much for my mom and my family!!!  Thanks Troyboy!  I don't think we say it enough!
Sorry Troyboy! This picture kills me everytime! He’s awesome! Best Step-Daddy a girl could ask for! He does so much for my mom and my family!!! Thanks Troyboy! I don’t think we say it enough!
Grandpa Bloesser and I apparently need to get a picture together!  I had to go searching!  Grandpa Bloesser loves mixed nuts, but he always has them at the house so I wanted to get him some goodies that he doesn't have regularly.  I got him some Peanut Butter Snickers and 3 Musketeers!  I can remember him always having 3 Musketeers when I was little!
Grandpa Bloesser and I apparently need to get a picture together! I had to go searching! Grandpa Bloesser loves mixed nuts, but he always has them at the house so I wanted to get him some goodies that he doesn’t have regularly. I got him some Peanut Butter Snickers and 3 Musketeers! I can remember him always having 3 Musketeers when I was little!
For my Grandpa Underhill, I filled him up with a variety of chocolate candies!
Alright Victor, you got out of a picture this time but I will make it happen....someday!  This is Alex's dad when we went to the Royal Gorge last year.  He refused to let me take a picture of him!  I hooked him up with some Sugar Free Twizzlers...which I might add are hard to find..So a HUGE shout out to CVS!
Alright Victor, you got out of a picture this time but I will make it happen….someday! This is Alex’s dad when we went to the Royal Gorge last year. He refused to let me take a picture of him! I hooked him up with some Sugar Free Twizzlers…which I might add are hard to find..So a HUGE shout out to CVS!


Daddy’s Stache


MATERIALS:

Jars

Spray paint

Vinyl

Glad Press & Seal (or transfer tape)

Cricut Mustaches & Glasses Digital Cartridge

“Stache” of desired goodies…candy, nuts, etc.


INSTRUCTIONS:

IMG_0084
I grabbed some Krylon Metallic Spray Paint from Walmart (which I got carded for! lol) for the lids. Two quick coats on the tops and sides of the lids and you should be good.
After weeding out the excess vinyl, press the vinyl cutout onto Glad Press & Seal (or transfer tape).
After the vinyl is attached to the transfer tape, peel the backing off the cutout carefully.
Make sure to line up the sticky side carefully onto the jar as straight as possible and rub onto jar pressing out all of the air bubbles.
So cute!
So cute!
Love, love, love the final product!