I keep seeing all of these cute anchor charts on Pinterest and I tend to over look them because I never have chart paper for them. I was starring at my math bulletin the other day and was debating on what I could do to it to make it more interactive in my classroom. As I was browsing Pinterest, it hit me! Why do I need chart paper when I have gigantic rolls at my disposal right there at school! I decided to place an extra sheet on top of my bulletin that I could write on with marker and leave up during that unit! Then when it is time to start a new unit, I can rip it off and put up a new one!
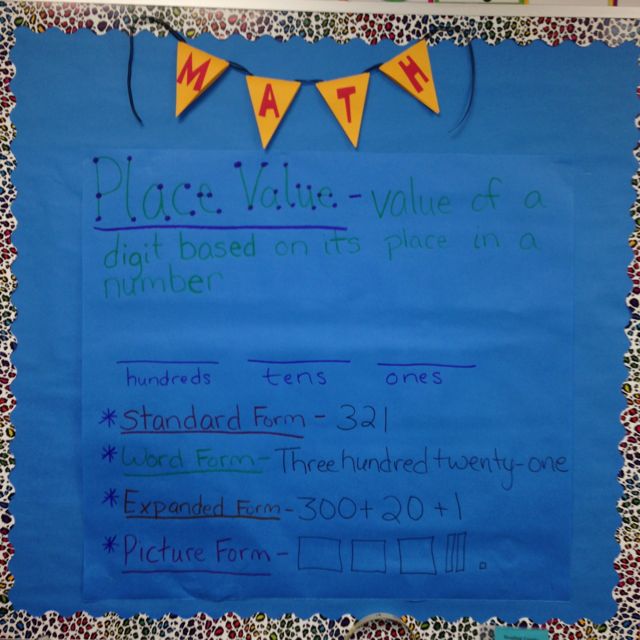
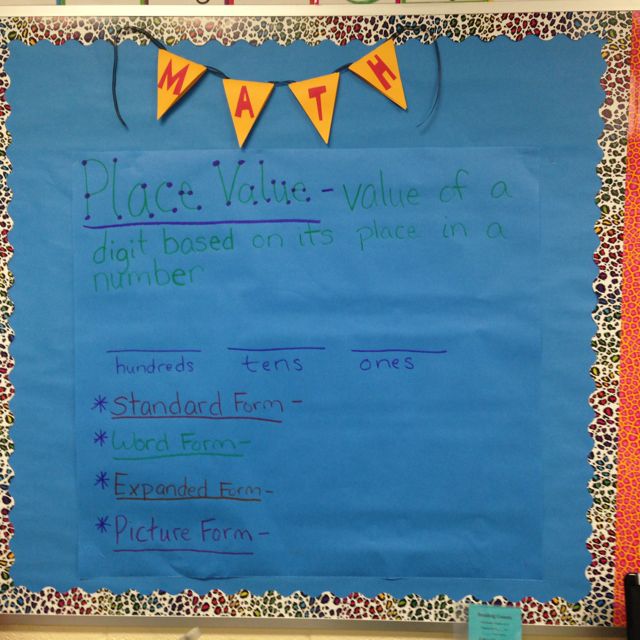
The blue bulletin is dedicated to math. I had vocabulary cards on a pocket chart for my Math board right when school started.I made this on my plan time just to get it set up nicely before class started.We filled out the anchor chart while discussing the different forms to show a number.
This actually turned out better than I thought it was going to. About 5 minutes after we did this anchor chart, I moved to the front of the room and was working on some guided problems together. I remember one of my sweet little girls shouting out, “Ms. Nuckles! That is STANDARD form!” It was such an ah-ha moment! We had a lot of fun and the kids seem to be using it to help them while answering questions that I ask them throughout the lesson. We have a couple more days of place value, but I am excited to start planning my next one!
I had a pretty productive Sunday. Got some housework done and lounged around with Alex for awhile. It was a pretty relaxing day. Alex was glued to the tube watching and it gave me a chance to get some stuff done. I have been thinking a lot about my blog and how much I miss getting blog posts in. I feel like I am constantly doing cooking new recipes and doing projects that I plan on blogging on, but I have been so exhausted by the time I get home. I have a hard time getting motivated to work on my blog. So tonight I made wings and came straight upstairs after dinner to get my post done! Here I am!
When Alex and I first started dating, we spent many nights at Buffalo Wild Wings because we both love chicken wings! Alex makes some killer wings on our Traeger Grill. If you have a Traeger and you haven’t ever smoked wings on it, do yourself a favor and try out this recipe. I think we have been to Buffalo Wild Wings less then 3 times since we started smoking our own wings at home. The ones we make are so much better, and even better FOR you as they are not fried in grease. Alex had me pick up some wings for dinner tonight. Since he was enjoying his Sunday football, I decided to take a stab at them and make my man some delicious wings! They were so easy and they were even Alex-approved!
Ingredients:
Chicken Wings
McCormick Grill Mates Pork Rub
Olive Oil
Frank’s Red Hot Wings Sauce
Salt & Pepper
Directions:
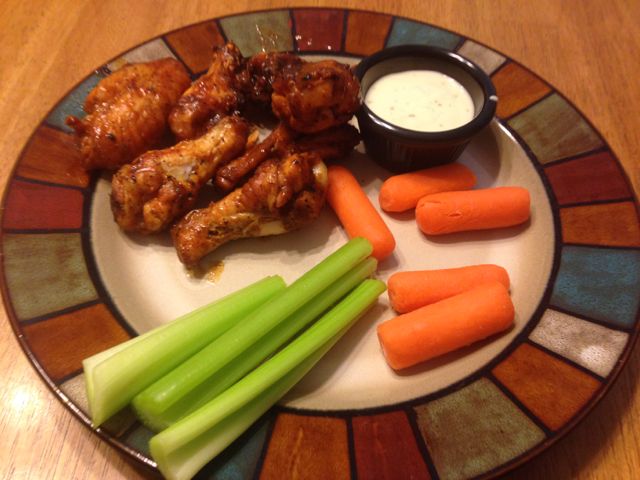
Turn on the Traeger to smoke with the lid open for 5 minutes. Then crank up the heat to 350˚ and preheat for 10-15 minutes. While the Traeger is smoking, rinse the wings in cold water.Pat the sings dry with paper towels.After all the wings are rinsed and dried, it is time to add some seasoning.I did not measure but I just gave the rub a generous shake over the wings and a drizzle of olive oil.After working in the rub and olive oil, I added a few cranks of sea salt & ground pepper. I tossed them around some more after that.Spread the wings out evenly directly on the rack. Smoke on 350˚ for 25 minutes.Smoke on the other side for about 10 more minutes or until the wings temp out at 165˚.This is the BEST wing sauce I have ever had! We keep a few bottles on hand!Give the wings a generous drizzle of wing sauce.This reminds me of good old Applebees! Put the lid on a shake that bad boy!Serve with some veggies and ranch! Super Yummy!
Fridays can tend to be a pretty crazy day for me at work. We usually have a language arts assessment of some sort, and this Friday we also had a math test! I try to make sure to squeeze and art project in on days like that to give my kiddos something fun to look forward to. I love art days! My school does not have an art program at the elementary level, which I feel is very important. Last year, my class did a musical called The Color Factory. It was the cutest program where they sang songs about colors and had little skits in between. I was surprised when my music teacher told me that some of the kids did not know how to mix colors! I couldn’t believe it! Once I thought about it, it made perfect sense because they do not get the opportunity to have classes with an art teacher. I made sure to squeeze a lesson on ROYGBIV to help them learn the colors of the rainbow. I am looking forward to doing that lesson again with my class this year!
This is the first art project we did at the beginning of the year. I found it on Pinterest. It seemed fitting since our school theme this year is Reach for the Stars. It was super easy and the kids loved it. We just traced our arm and hand and they colored them however they wanted
This week we got a chance to do coffee filter art! I love this project because they were able to use their imaginations to make their coffee filter into whatever their little hearts desired. We had planned on doing this project last week and I usually try to have an example made before we start so they can get a visual of what their final product will look like. Unfortunately, last week our test took longer than I had anticipated, so we had to push it until the next week.
My coffee filter art example.
This week they kept asking me when we were going to get a chance to do our art project. One of my sweet girls came up to me while we were waiting for buses one day this week and handed me a book from my classroom library titled What is Round? by Rebecca Kai Dotlich with photographs from Maria Ferrari. She thought we needed to read it to inspire our artwork! I made sure read this book before we got started. It started a great discussion before we got started.
This is the book that we read before we started our art project! It was a great way to get them started brainstorming on what they were going to make out of their coffee filter!
Materials:
coffee filters
markers
squirt bottle with water
glue
construction paper
Instructions:
Fold filter in half.Fold the filter into fourths.
Then fold into eighths and spray with water bottle generously on both sides.Start making a design on the filter with markers. Since the filter is wet, watch the color spread throughout!
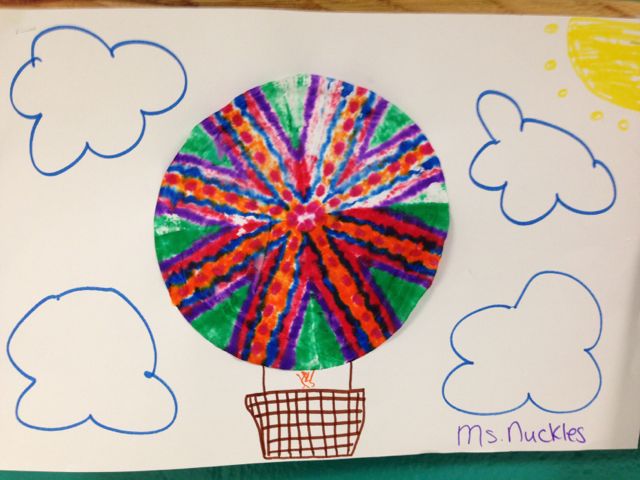
Make sure to do the EXACT same pattern on the back. This will ensure that the marker bleeds through the entire filter.Open it up and viola! Instant artwork! Then comes the fun part! You get to decide what to make it into!Here is my class example that I did with the class on Friday. This one is much more colorful and turned into a beautiful hot air balloon!
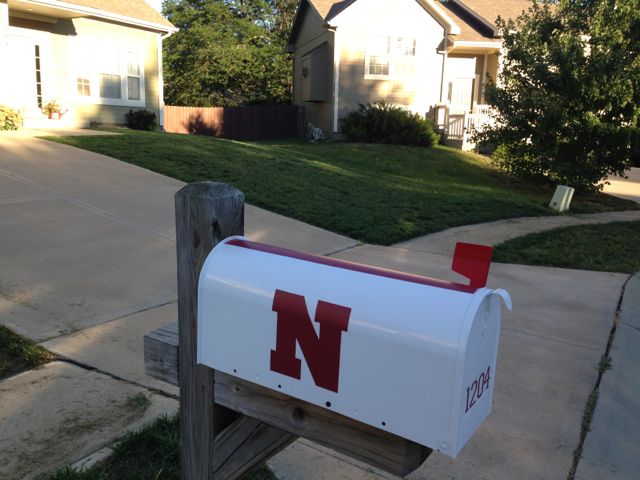
Well it is that time again! Football season is finally upon us and just in time for a mailbox makeover! A few weeks ago, I went out to check the mail and let’s just say our mailbox has seen better days! We used to have a black plastic mailbox that rarely would shut and this time one of the hinges broke off.
It occurred to Alex and I that maybe it was time to bite the bullet and buy a new mailbox. This gave me the perfect opportunity to do something crafty with it! Alex loves his Huskers, so I wanted to find a mailbox that I could spray paint red and use white vinyl for the N. Alex decided a white mailbox with red vinyl would match their helmets, so that is what I did. I did not like the color of red that I could find, so I decided to use acrylic pain and use the vinyl as a stencil. This ended up being what I like to call a DIY “fail” as I let the paint dry before ripping off the stencil. Let’s just say I made a huge mess of it and ended the afternoon scrubbing the paint off in the sink. It came off pretty well and I decided after that hassle, the darker red vinyl would just have to work!
Ordinary white mailbox from Home Depot.Side viewI cut out two N’s and a strip for the top of the mailbox.