Posted on Leave a comment

Makeup Makeover

Want a fun way to store your makeup so you do not have to dig through your makeup bag every morning??

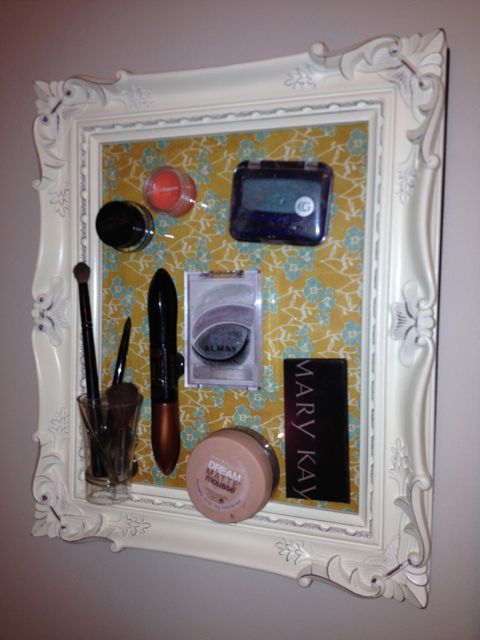
I am not quite sure what I would do without Pinterest!  This is a project I did about a month ago and here I am just getting it posted!  I hate having to dig through my makeup bag every morning for my basics that I use almost every day.  I rarely switch things up very often.  I am simple as in I either go with blacks or browns depending on what I am wearing for the most part.  This is obviously not everything in my makeup bag but I just wanted the things I use all the time to be readily available.  What I love about this is the fact that it gives me a little “artwork” for the wall too!

Now this was a very simple task minus the reorganizing it took for me to get it put in a good place for me to conveniently use it.  I bought all of the stuff to make it and realized that since my side of the sink was by the towel rack I was not sure where I was going to hang it.  Alex was thrilled when I asked him if we could trade sinks so I could hang it up where I could reach it easily (not really!).  I told him to relax because I would do all of the work and he would not have to worry about anything.

This was not exactly my idea of a good time...but in the end I organized and threw away a bunch of stuff so I didn't mind!  You can imagine Alex's face when he walked into this.  I assured him that it would be ok!  Lol
This was not exactly my idea of a good time…but in the end I organized and threw away a bunch of stuff so I didn’t mind! You can imagine Alex’s face when he walked into this. I assured him that it would be ok! Lol
My side
My side: AFTER
IMG_0025_2
Alex’s side: AFTER
IMG_0026_2
I even reorganized the top of our bathroom counter!

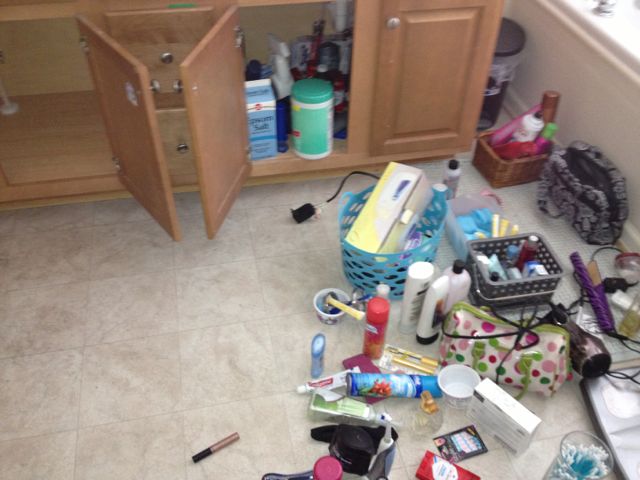
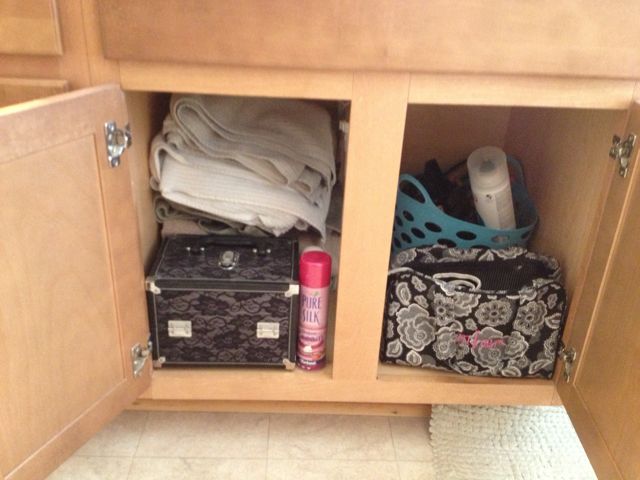
Now that I have the entire thing moved over, things are much more organized and the pluggins at my new sink are working out beautifully!  We are still adjusting to our new sinks!  Of course after I got this completed and it was time to hang it up…there were not any studs close enough to the mirror for me to hang it up but I did it on the wall behind me.  Needless to say there was no need to switch sides in the end but at least I got it purged and organized!

So here is the tutorial for making your own framed makeup artwork:
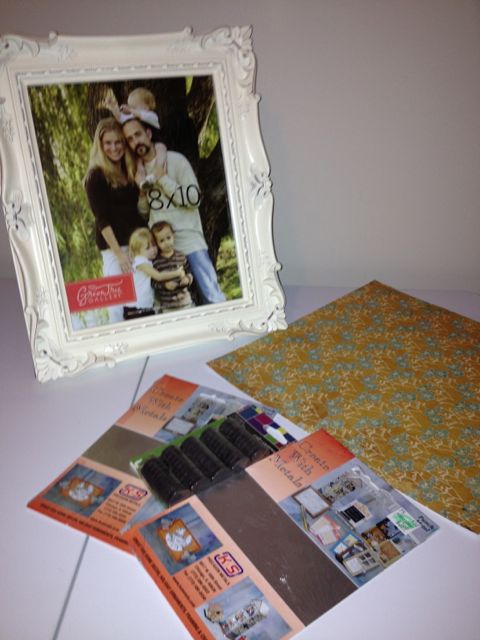
Items needed: Frame  Metal sheets  Magnets Scrapbook Paper Hot glue
Items needed:
Frame
Metal sheets
Magnets
Scrapbook Paper
Hot glue

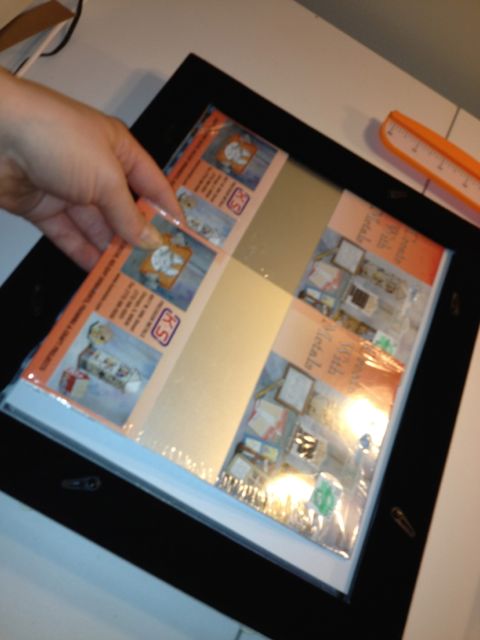
If you want to do all or more makeup, I would go with a bigger frame.  This one was just an 8×10 frame that I found at Hobby Lobby.  I only wanted to do a small version because I do not use most of my other makeup unless I get a wild hair.  The metal sheets I found at Michaels and two of them fit my 8×10 frame perfectly.  The other tutorials I found for this took out the glass and modpodged the paper to the metal piece.  I just happened to try it with the glass so if I get sick of the paper I chose, I could always switch it out.  You can find metal sheets at Lowe’s or Home Depot that they can cut to the frame size you go with that would probably be a stronger hold for the magnets.  If I were to do it over again I would have done that.  Honestly I was being kind of lazy by just using the ones from Michaels but they worked so I am ok with that!  Also make sure that you get magnets with a strong hold.  They have all different strengths available.  The stronger the magnet, the more likely it is going to stick better!

Cut the scrapbook paper to the size of frame that you chose.
After placing the scrapbook paper in the picture frame, Place the metal sheets behind it and place the back of the frame and you are ready to go!
Before gluing all of the magnets to your makeup, it is a good idea to make sure the magnets are going to stick.
Last glue magnets on the back of your makeup to place on the frame.  I did have to do 2 magnets on some of the heavier things such as the foundation.
Last glue magnets on the back of your makeup to place on the frame. I did have to do 2 magnets on some of the heavier things such as the foundation.
I used a plastic shot glass with a magnet to hold my brushes and that worked out well!  On other tutorials some used an old medicine bottle and painted it to go with the scrapbook paper colors.
I used a plastic shot glass with a magnet to hold my brushes and that worked out well! On other tutorials some used an old medicine bottle and painted it to go with the scrapbook paper colors.

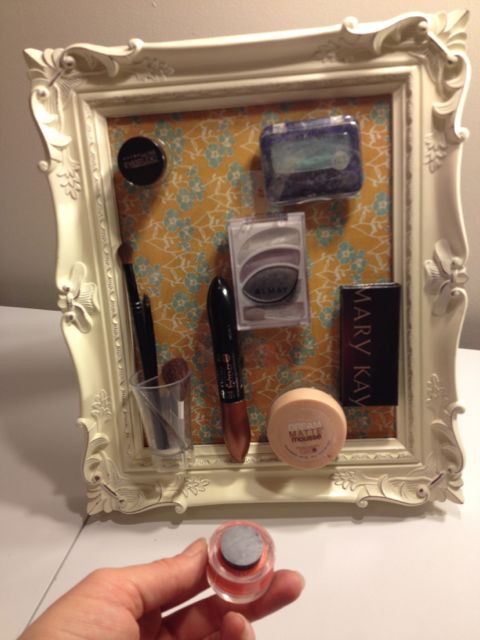
This has worked out really well and I love having everything right there for me.  I worried about traveling with it but the magnets can be pried off pretty easily so no big deal!  Let me know what you think and Happy Crafting!


Posted on Leave a comment

Diva Dash 2013

Well things have been super crazy around here.  It is Spring Break and I am just now sitting down to get some blogging in!  I have been busy traveling the state of Kansas since last Friday.  It seems like the week has just flown by!  I got my El Ranchito fix (a few times!) and got some qt in with my family before coming back to Kansas City on Wednesday.  I had big plans on getting some things done in Amber’s Craft Studio and here I am on Saturday and it is the first time I have even had a chance to log in!

Tracey and me at last year's Diva Dash 2012
Tracey and me at last year’s Diva Dash 2012

This morning I ran the Diva Dash with some of the Turner Elementary Crew!  I was a bit nervous about it because I have not gotten hardly any runs in since I was sick right after conferences (Valentine’s Day).  I was not too worried about it, but the runner in me wishes I would have been more ready for the race so I could have challenged my time from last year.  Last year I ran it in 27:34.  I may have been able to do that a month ago when I was doing really well with my running schedule.  Today I ran it in 30:21 and I will take that! Next year though it is on!

Turner Elementary Divas
LOVE the bibs this year!  Too Cute!
LOVE the bibs this year! Too Cute!
IMG_1552
Got a rockin’ Diva Finishers Medal this year! I will hang that up next to my Warrior Dash one from last year!
Got Our Bling!
Got Our Bling!


Had a blast with the Turner Divas today!  We are hoping to schedule some more races soon!  It was cold but we made it!

I have officially registered for my first half marathon for May 18th!  I will be running the Go Girl Half Marathon in Olathe.  I was supposed to run one on May 5th with my bestie for her 30th birthday but her hubby accepted a job in New Mexico this month so they will be busy getting moved.  I hope to run one with her soon!  Let the training begin…Again!  Let’s hope I don’t get sick so I can get back into the grove of things.  I am using Couch to 13.1 app by Trish Blackwell on my iPhone.  I got sick around Week 6 so I am planning on jumping back into Week 5 starting Monday.  That will give me a full 8 weeks of training before the run in May.  Wish me luck!

Click here to follow me on dailymile.com


Posted on Leave a comment

Cowgirl Taters

Coming home from work today, I was trying to decide what I was going to make for dinner.  I wanted something easy but since I had a PB&J for lunch I was hungry for something hearty!  Sloppy Joes made the cut tonight and I figured it was the perfect time to blog about one of my favorite side dishes.  This side dish is inspired by my amazing step dad Troyboy!  Troy is a pretty mean cook and makes the best cowboy taters that he makes almost every time I am back home.  I have been making these for awhile but since I am trying to eat clean, I wanted to see if I could tweak it to save some calories.  I decided I would call them “Cowgirl Taters” since they are made with sweet potatoes!

Troyboy and I out and about in KC for my 29th birthday!

I have blogged about how much I love sweet potatoes before and I meant every word of it!  They are so good for you and packed full of Vitamin A.  It is funny because I am amazed at how much my tastebuds have changed over the years.  (Alex would beg to differ because I do not always like to try new things but I get braver the older I get!)  I eat a lot of things these days that I would have never ate as a child.  Mushrooms, onions, peppers, avocado, and sushi to name a few…  If you were a picky eater as a child, I challenge you to try new things!  You may surprise yourself!

It seems like the sweet potatoes we always get are HUGE!  One is plenty for the 2 of us but if you are cooking for more you will need to double it.  Also, I only used about 3/4 of the onion.  The rest I threw in with the Sloppy Joes.
It seems like the sweet potatoes we always get are HUGE! One is plenty for the 2 of us but if you are cooking for more you will need to double it. Also, I only used about 3/4 of the onion. The rest I threw in with the Sloppy Joes.


Ingredients

1 large sweet potato

1 medium red onion, minced

2 minced garlic cloves

olive oil

salt & pepper

Instructions

Chop up the sweet potato and toss into a med/high heated skilled with a drizzle of olive oil.  Toss in minced onion and garlic along with some salt and pepper.  Saute uncovered until potatoes are thoroughly cooked.  Enjoy!

So yummy!
So yummy!


Posted on Leave a comment

Supreme Spaghetti

images

Who doesn’t like a good old fashioned plate of spaghetti?  It was always one of my favorites growing up and I still make it a lot today.  My mom makes a killer spaghetti cheese bake that I will have to blog about sometime.  I, however, cannot make it like she does no matter how hard I try!  My mom loves watching Ree Drummond aka The Pioneer Woman and is always telling me about recipes that she sees on her show.

Love my mama!
Love my mama!

I have made her lasagna a few times and it is killer!  I have never made sauce from scratch before and she has perfected it!  It does take some time but if you are looking to impress…make it!  It is fabulous!  I have always just grabbed a can of store bought sauce,  but when I tried Ree’s lasagna sauce I was overwhelmed with flavor.  I used her sauce ingredients for inspiration for my supreme spaghetti sauce.  I did add some green peppers and mushrooms to give it some color and spice it up a bit!  I wanted to make sauce from scratch, but I did not necessarily want to have to spend 2 hours simmering the sauce.  I love using my crock pot, so I decided to try to make a crock pot spaghetti sauce.  I I vow to never use a can of spaghetti sauce (unless its an emergency) again!  This sauce turned out even more delicious than I would have imagined.  It is super easy and full of flavor.

Supreme Spaghetti

If you have never cooked with fresh garlic...you are MISSING out!  I was always scared to but it is so easy and keeps for a long time.  These days if I am cooking and out of garlic, I cringe at the thought of using that dreaded garlic powder!
If you have never cooked with fresh garlic…you are MISSING out! I was always scared to but it is so easy and keeps for a long time. These days if I am cooking and out of garlic, I cringe at the thought of using that dreaded garlic powder!
Look at the color here!  I had already threw the onions in before I decided to saute these.  Next time I will saute them all together!
Look at the color here! I had already threw the onions in before I decided to saute these. Next time I will saute them all together!
Toss them all in the tub!
I used turkey sausage and hamburger because that is what I had on hand.  I would definitely use ground turkey instead of beef for an even healthier version!
I used turkey sausage and hamburger because that is what I had on hand. I would definitely use ground turkey instead of beef for an even healthier version!  The turkey sausage is on the right…look at how much leaner the meat looks!
Brown all the meat together with some salt and pepper!
So full of flavor!
So full of flavor!


 Ingredient List:

1 lb hamburger

1 lb Italian turkey sausage

1 fresh green pepper, diced

1 white onion, diced

5 garlic cloves, minced

1 large can stewed tomatoes (32 oz)

1 can tomato paste (12 oz)

1 can tomato sauce (12 oz)

1 tbsp oregano

1 tsp thyme

2 bay leaves

olive oil

whole wheat spaghetti noodles

Instructions:

Throw stewed tomatoes, tomato paste, tomato sauce and spices into the crock pot on low. (I used a potato masher after a few hours and mashed up the stewed tomatoes to break them up a little bit.)  Brown hamburger and sausage in one skillet.  While the meat is browning, chop the onion and green pepper.  Mince garlic cloves. Saute the veggies in some olive oil.  Add the meat and vegetables to the mixture and cook on low.  Make the spaghetti noodles when it is about time to sit down to eat and top them off with the sauce!

Toss on top of some whole wheat spaghetti noodles and even a sprinkle of parmesan cheese!

This sauce was amazing and so easy.  There is nothing I like more than a good crock pot recipe.  I love the ease of throwing everything in and having a deliciously hot homemade meal ready when I get home from a long day of chasing around my 23 wonderful 2nd graders!  I told Alex that I was going to call it Supreme Spaghetti and when we sat down for dinner he told me that was the perfect name for it!  It was exploding with flavor!  The recipe made enough for 3 different meals throughout the week!  One night we put the leftover whole wheat noodles in a glass pan and topped it with a layer of mozzarella cheese before covering it with the sauce.  Last we topped it off with some  grated Parmesan cheese and baked it for 15-20 minutes at 350 degrees.  It was an entirely different meal!  I even thought pepperonis would be a good touch to add to it!

Layer the leftovers in a glass pan with some mozzarella and parmesan cheese to make a spaghetti supreme bake!

I got Alex a pizza stone for Valentine’s Day to use on our Traeger grill and have been wanting to break it out so I decided that the supreme sauce would be delicious thrown onto a pizza crust.  I ended up making a crust that did not call for yeast because we did not have any in the house.  The crust was alright but nothing special so I am not going to post the recipe for it.  When I was at Hyvee, I contemplated grabbing an already made crust and by the time it was ready to make the pizza and didn’t.  I wished I would have gone ahead and done that for the convenience factor. It was fine once I got it finished but next time I am going to look for a really good crust recipe.

When you cook with a pizza stone you must preheat the oven with the pizza stone in the cold oven before you even turn it on.  This helps the stone heat evenly and prevents the stone from cracking.  I ended up doing this in the oven because we were in the middle of a blizzard when I made this!  The pizza stone worked out really well!  It was definitely worth it!

Throw the sauce on top of a crust with cheese and you already have toppings in the sauce!
So good!
So good!

I had a blast with this recipe and loved how I could stretch the sauce out to make different meals out of it!  I think that may have been one of the best parts next to the ease of the recipe!  Check it out and leave me a comment to let me know what you think!