Posted on Leave a comment

Dark Chocolate Cookies

Dark Chocolate Cookies Minus the butter AND flour?? That's right!
“A day without chocolate is like a day without sunshine.”
”circle”


There are two things I could not live without…mexican food…and CHOCOLATE!   Alex teases me all the time about my chocolate consumption.  It is best that I do not buy bags of chocolate because it always ends up with me consuming the entire bag in sometimes one, maybe two days.  I wanted to find a recipe to try that I could not feel so guilty about.  I wanted a go to recipe to make if I am having a chocolate craving.

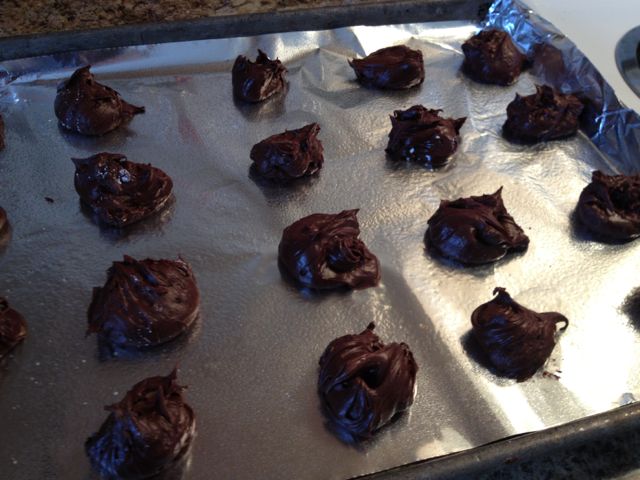
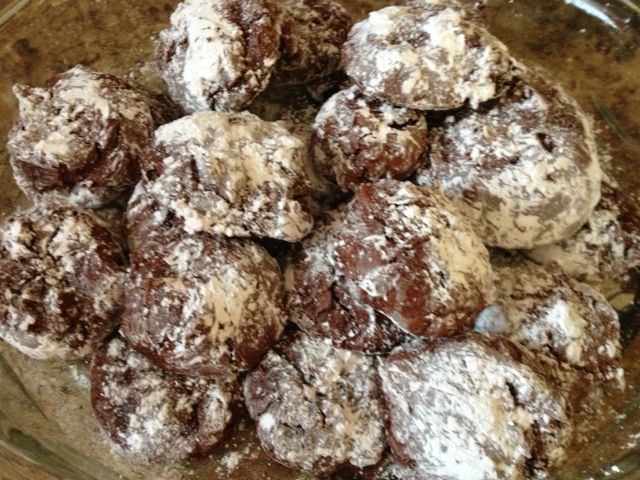
I kept running across flourless cookie recipes on Pinterest.   The blog that struck my fancy was one called picklee.com.  I mainly followed the recipe on her blog but as usual I tend to do my own thing.  The cookie texture was too soft to roll into the powdered sugar like she did so I rolled mine right after taking them out of the oven which seemed to work well for me.  Also I melted all of my chocolate in because the morsels were so big only a few cookies were going to have those chips.  I think if I were to do it again, I might buy smaller morsels and throw some in for the chocolate chip taste.  Either way they were delicious!  I made them for Super Bowl and they were a hit!

Dark Chocolate Cookies

***Please note that the recipe calls for 3 egg white at room temperature, so make sure you do this ahead of time.

IMG_1139

Ingredients

1 bag dark chocolate chips (approximately 9 ounces)

3 egg whites (room temperature)

1 tablespoon corn starch

1/2 cup cocoa

2 cups powdered sugar

1/4 teaspoon salt

nonstick cooking spray


Instructions

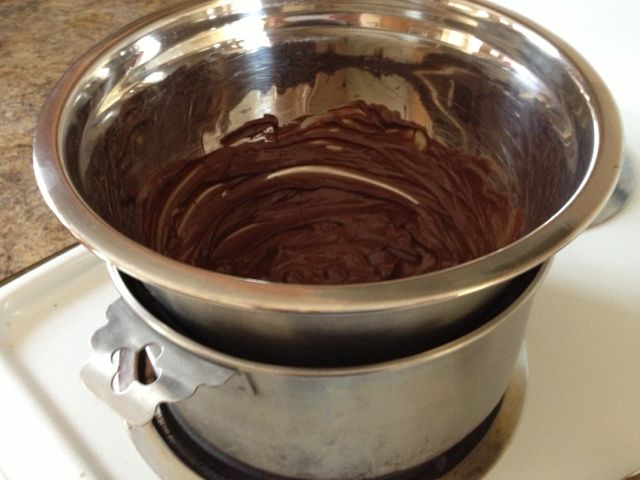
Preheat the oven to 350 degrees.  Melt the bag of chocolate. (You can keep a half a cup on the side to use for chips in the cookies if you wish)

This is the best way to melt chocolate without scorching it!  Use a metal bowl over a pan of boiling water.
This is the best way to melt chocolate without scorching it! Use a metal bowl over a pan of boiling water.

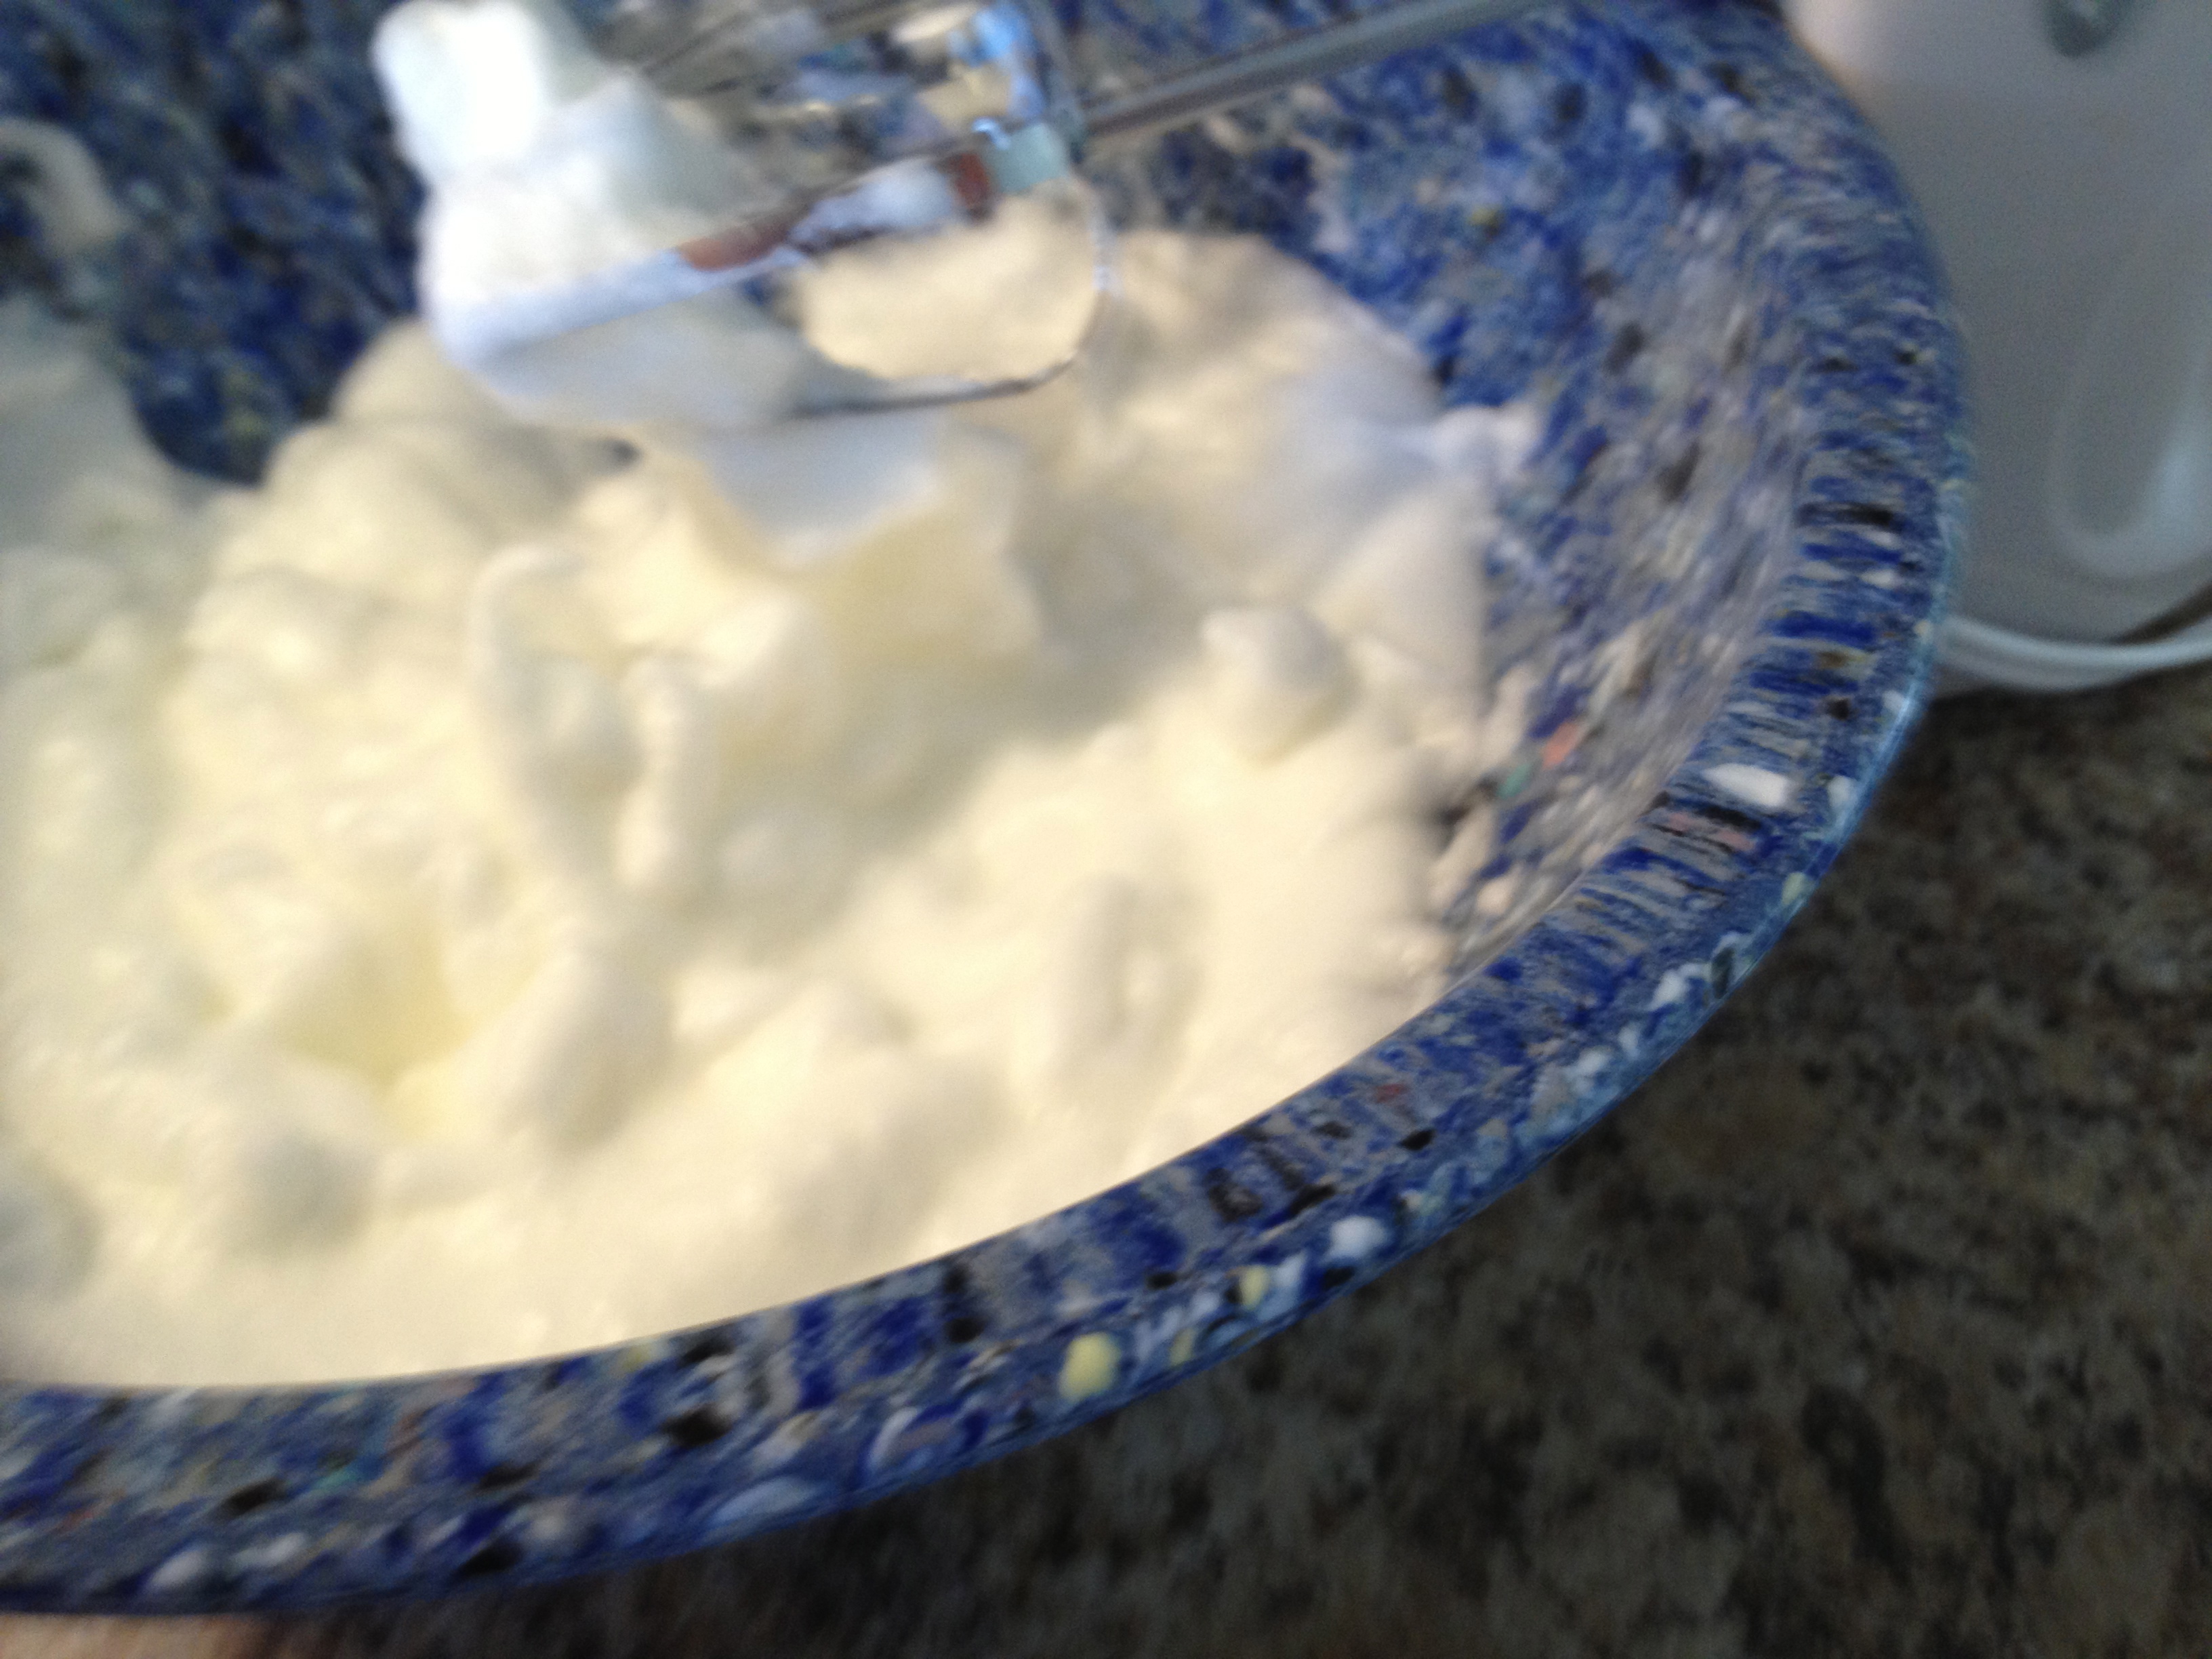
While the chocolate is melting, you need to whisk the egg whites to soft peaks. I used my electric beater because it takes awhile.

IMG_1144
Add 1 1/2 cup powdered sugar gradually.  Mix until you have a marshmallow creme texture.
Next add the rest of the ingredients minus the extra 1/2 cup powdered sugar. Mix to a meringue.
Drop spoonfuls of batter onto a sprayed cookie sheet about an inch and a half apart.
Cook for 12 minutes or until the tops crack.  After the cookies cool, roll them in a bowl with 1/2 cup powdered sugar.  Delicious!
Cook for 12 minutes or until the tops crack. After the cookies cool, roll them in a bowl with 1/2 cup powdered sugar. Delicious!


Posted on Leave a comment

Valentine’s Day Treat Boxes

My 3 Tier Valentine's Day Cake
My 3 Tier Valentine’s Day Cake

So the second I got a Cricut I was sure to order the Sweet Tooth Boxes Cartridge to make a paper cake for my kiddos for Valentine’s Day!  The hardest part was figuring out the measurements.  I set the base of the cake slices at 8 inches.  If you use Cricut Craft Room, there is an option in the layers tab to make the lid transparent so you can line up the folding edges so that the lid fits.  I tried finding exact measurements but it seemed as though no one had mentioned any measurements in the blogs that I had come across on Pinterest or YouTube.  It seems like for these types of Cricut projects you almost have to play around with them before you cut a bunch out.  Once I matched everything up I used a heart with angel wings from the Create a Critter Cartridge.

I used my Cuttlebug to emboss hearts into the icing for a Valentine's Day touch!
I used my Cuttlebug to emboss hearts into the icing for a Valentine’s Day touch!

I had a hard time finding Valentine’s Day paper that was not going to cost me an arm and a leg.  I found the perfect Cuttlebug Embossing Folder to make hearts in the frosting!  If you own a Cricut and do not have a Cuttlebug I suggest you get one!  They are AMAZING!!!  They add such a great touch to cards, etc.

Each kiddo will get their own slice filled with some Valentine's Day goodies!
Each kiddo will get their own slice filled with some Valentine’s Day goodies!
Ariel View!
Ariel View!
Are these not perfect??  I can't wait to see their faces!
Are these not perfect?? I can’t wait to see their faces!


Posted on Leave a comment

Fresh New Year…Fresh New Look!

So far my 2013 is starting off with a bang!  New motivation as I am officially turning the big 3-0.  I am doing a killer job kicking off my new healthy lifestyle and I couldn’t be more happy about it!  I am really exited about this blog, and everything I am lining up for it!  I have loved Pinterest since it came out but I never really utilized it as much until now.  I am enjoying my re-found love for crafts and I love me a good Pinterest Recipe!!  I hope that the 30’s are the best years because I know how much I grew in my twenties and now that I am inching towards the next chapter of my life.

Anyways….onto my project…I moved in with Alex last summer and since he had a house with everything already here and not much room for any furniture of mine I sold and donated most of my stuff (Alex would probably disagree but I DID get rid of a lot of stuff!  I just have a lot of stuff so I still have a lot! lol)  All of my stuff was black and all of his stuff was brown so I had a hard time using any of my decor because it was too black.  I think I have finally found a way to kind of bring the whole room together.  Feel free to post a comment I would love some feedback.  Alex doesn’t seem to appreciate my decorating talents but he knows it makes me happy so he gets over it!

Here is the love seat BEFORE...
Here is the love seat BEFORE…
and AFTER!  Don't the pillows give that love seat a little personality?!  I sure think so!
and AFTER! Don’t the pillows give that love seat a little personality?! I sure think so!
Here is another Pinterest project that I threw in to pull the colors together!  This was super easy....tutorial below
Here is another Pinterest project that I threw in to pull the colors together! Notice there is brown AND black together so if I want some black frames they go just fine!  This was super easy….tutorial below.
It looks so cute above the little bench from Alex's parents from Christmas
It looks so cute above the little bench from Alex’s parents from Christmas
IMG_1160
Love the hints of green and yellow!
There are several different sizes of styrofoam at any craft store.  I don't even remember what size this was.  It took me about 10 minutes.  The worst part was trying to figure out how to hang it.  I am too embarassed to show what I did but the only thing I could get to hold was a piece of cardboard that I cut a slit in and that is what it is hanging from.  This is nothing fancy folks...but I think it looks pretty cute!
There are several different sizes of styrofoam at any craft store. I don’t even remember what size this was. It took me about 10 minutes. I just made sure to pull tight and stapled all around.  The worst part was trying to figure out how to hang it. I am too embarassed to show what I did but the only thing I could get to hold was a piece of cardboard that I cut a slit in and that is what it is hanging from. This is nothing fancy folks…but I think it looks pretty cute!

 Pillow Makeover…Nuckles Edition

IMG_0020
Pillow Makeover…Nuckles Edition

Originally I was planning on doing a no-sew pillow like a few that I had pinned on Pinterest….

I even went as far as buying the fabric glue.  I got it home and thought to myself what are you thinking.  You hate using fabric glue…why didn’t you at least by that stitch witchery stuff that irons on?  I was mad at myself for even buying the glue because I hate using fabric glue and I have ever since as long as I can remember.  I have not sewn something by hand other than fixing small holes in work pants and the constant plastic surgery from sewing up lil Miss Chloe’s toys.  (Alex thinks this is silly and I should just toss them but he does not understand why I don’t just throw them away and that is simple…Chloe loves her toys and I love my Chloe.  Chloe’s favorite toys make her happy therefore I am happy to sew them up instead of throwing them away and besides…she loves them.  She even knows their names.  If one that didn’t make the name cut that means she never played with them so I can just toss them if they get torn up.  Mia on the other hand is not as worried about

I had a little bit of a hard time nailing down the final measurements for this thing but I tried to perfect it by the last one and it seemed to have paid off.  The pillow I used was an 18″ pillow.  Let’s just say measurements is not really my thing and with this whole crafting thing measurements are pretty important.  (I should have called my Grandma Bloesser right off the bat and asked her a million questions like I usually do but I wanted to do it on my own and I think she was a little tickled when I told her I sewed my pillowcases by hand!)  I did sew 5 pillow cases and if you look in the picture there are only 4 pillows….I messed up on one and made it too tight and I went and bought an extra yard and did a last one because it was going to drive me crazy.  The measurements I used was to cover an 18″ pillow.

Cut a piece of fabric 42" x 20"...hem the short ends to 1/4" hem.
Cut a piece of fabric 42″ x 20″…hem the short ends to 1/4″ hem.
IMG_1154
Lay fabric design side up. Fold one side up and measure the crease fold in 11″. Pin the sides and sew about a 1/2″ down the side to form a pocket.
IMG_1152
Sew a 1/4″ hem on the sides left.
IMG_1158
After turning the pocket inside out, tuck the pillow in and tuck in the “envelope”. I ended up sewing my sides shut and tacking the “envelope” tag down and sewing buttons on it.
Alex thought this was unnecessary but if I was going to hand sew 4 pillow cases...they were damn sure gonna have some pizazz!
Alex thought this was unnecessary but if I was going to hand sew 4 pillow cases…they were damn sure gonna have some pizazz!
Alex's biggest concern was the buttons would be uncomfortable and my answer was plain and simple..."then you lay your head on the other side..and they look cute.."  I think they add character! :)
Alex’s biggest concern was the buttons would be uncomfortable and my answer was plain and simple…”then you lay your head on the other side..and they look cute..” I think they add character! 🙂

There was one more mini project that I worked on to pull the room together.  I had a silver vase that went will all of my stuff from my apartment.  I had tossed around the idea of painting it but I bought some mod podge from Michael’s a while back and I was itching to use it!  I have never used the stuff before and I thought I needed to give it a shot.  I found a scrapbook paper that was brown with little hints of flowers on it and cut it up into strips.  I just painted the mod podge on with a paintbrush and pieced the scrapes on the vase and it turned out really cute!

Vase before...
Vase before…
Vase after!
Vase after!   I love the textured look it gave the vase and I am debating on attacking some picture frames with it as well! Then I had to remind myself one thing at a time!
I bought some extra flowers for my antique birdcage that my Grandma Bloesser gave me a long time ago!