Posted on Leave a comment

DIY Lined Dresser Drawers

Avery's beautiful dresser all made over!
Avery’s beautiful dresser all made over!

I am so pleased with the way the dresser came out for Avery’s nursery.  This is exactly what I had envisioned it to be.  A huge shout out to my amazing step dad for sanding this puppy down so my mom and I could paint it!  I must also say that chalk paint is amazing stuff!  I ended up keeping the hardware and giving it a metallic spray paint to get it a fresh look.  Replacing hardware can get really expensive and I am really happy with the way they turned out!  Thank you to my mom for spraying those for me since I am not allowed to use spray paint right now!

If you have not seen the before, here it is!  I was not a fan of the metal "tassels" that are on the top two drawers, so Troy took them off and plugged them up before we painted.  It is really hard to believe it is the same dresser!
If you have not seen the before, here it is! I was not a fan of the metal “tassels” that are on the top two drawers, so Troy took them off and plugged them up before we painted. It is really hard to believe it is the same dresser!

This dresser had been in the shop at the farm for awhile, so it took some good wiping to get the inside clean.  I really wanted the drawers to be painted on the inside, but the paint was just not soaking into the inside of the drawers like we wanted.  Of course, we had already tried it, so I had some fixing to do!  I went to my handy dandy pal Pinterest and started looking for ways to line the drawers.

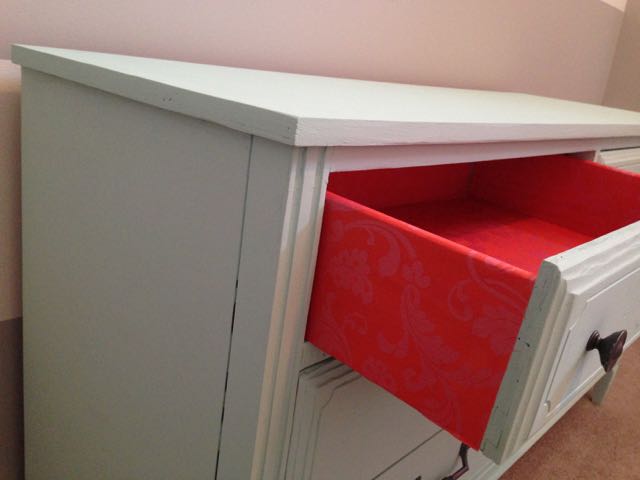
I decided to do a Mod Podge lined drawer with fabric.  I looked for paper and wrapping paper first, but decided with the amount that I needed, it was actually cheaper to do fabric.  This project was super easy.  All I did was measure the sides from the inside down the outside of the drawer and from the front of the inside of the drawer to the very edge of the back of the drawer.  I am not going to post my measurements, because every dresser would be different.  I had a total of 3 pieces of fabric cut for each drawer.  Two for the sides and one for the bottom and back of the drawer.

First you paint a layer of Mod Podge on the outside of the drawer.
Line up your fabric piece and lay it down smoothing out any air bubbles.
Paint another layer of Mod Podge on top of the fabric to seal it in.
Then do the same on the top edge all the way down the inside of the drawer.  The piece should lay nicely right over and into the drawer.
Then do the same on the top edge all the way down the inside of the drawer. The piece should lay nicely right over and into the drawer.  After getting the material smoothed down, add another coat of Mod Podge on top of the fabric to seal it in.  Repeat on the other side of the drawer.
Then do the same thing with the bottom piece.  The only thing I did differently is not covering the whole back panel of the drawer.  You will not see it anyways!
Then do the same thing with the bottom piece. The only thing I did differently is not covering the whole back panel of the drawer. You will not see it anyways!  I also didn’t do the front part of the drawer as it was not necessary!
Add your sealant coat and wait for it to dry!
I am in love with the way this turned out!
And look at that "pop" of color when you open the drawer!
And look at that “pop” of color when you open the drawer!

Have I ever mentioned how much I love Mod Podge?  It never does me wrong and it always keeps things together better than you would imagine!  I am already planning my next Mod Podge project for the nursery, so check back soon!


Leave a Reply

This site uses Akismet to reduce spam. Learn how your comment data is processed.