We actually found out back in November that we were expecting a little girl in June. I was only 11 weeks along, and there is a new blood test out there called Verify by Progenity. They test for chromosomal disorders and pulls the baby’s DNA right from my blood stream! I am amazed at what they can do these days! However, I was not buying anything until we had out 22 week sonogram to verify it! When the ultra sound tech asked us if we wanted to know or already knew, we told her we had the blood test and she said it is about 99% accurate. I still wouldn’t tell her what the result were because I wanted her to look herself and sure enough…it’s a girl!
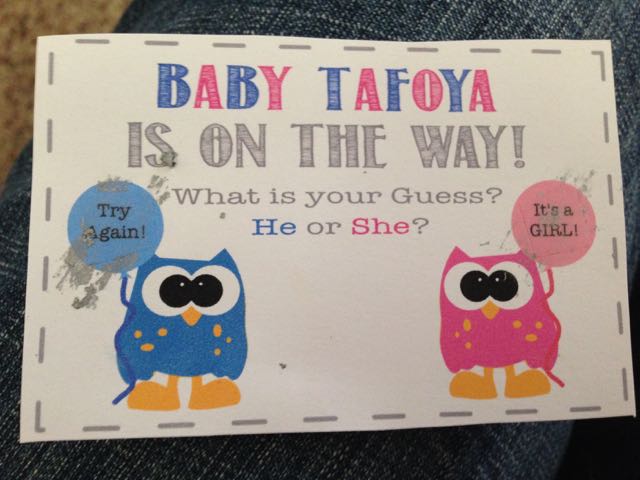
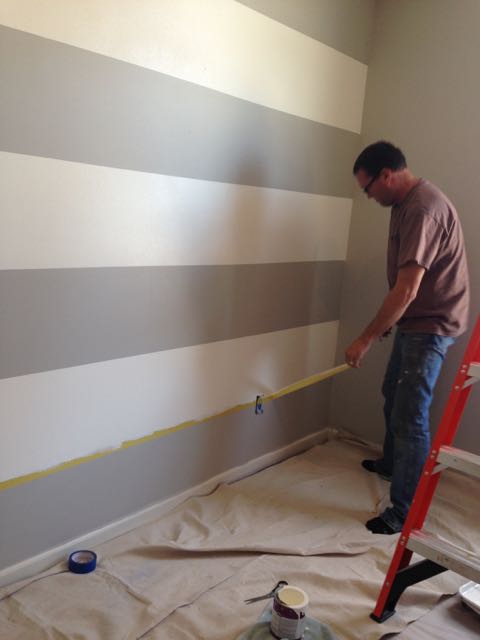
These are the scratch off tickets we used to let my family in on the sex of the baby! They were fun, but the ladies were screaming , “It’s a girl!!” before some people even got them scratched off!These are the scratch offs we made for Alex’s family. He wanted something more complicated. I put all the letters for girl along with a b and y, they had to scratch them all and spell either “girl” or “boy”Here is the room before we got started. This was the spot for my beloved craft room, but it is time to start making room for our baby!My wonderful mommy and amazing stepdad came down over the last weekend of my Spring Break and helped us paint the nursery.
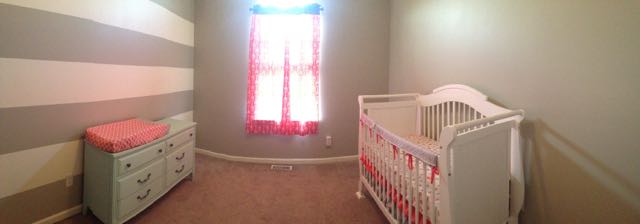
No one understood why I wanted gray walls for a nursery. They didn’t understand my vision of an accent wall with white stripes, but it turned out so beautiful! I guess mommies just know best!
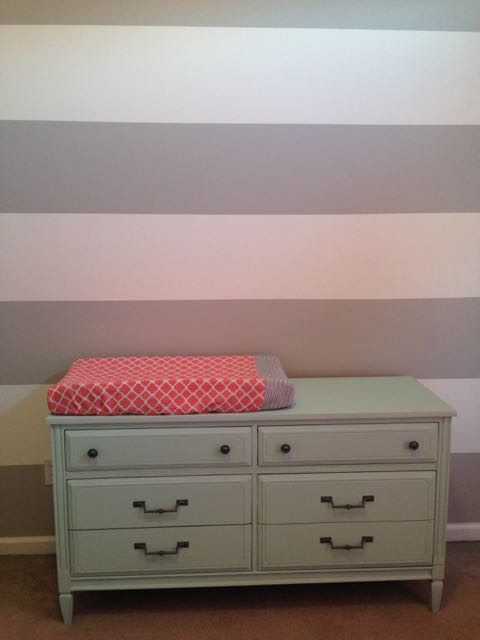
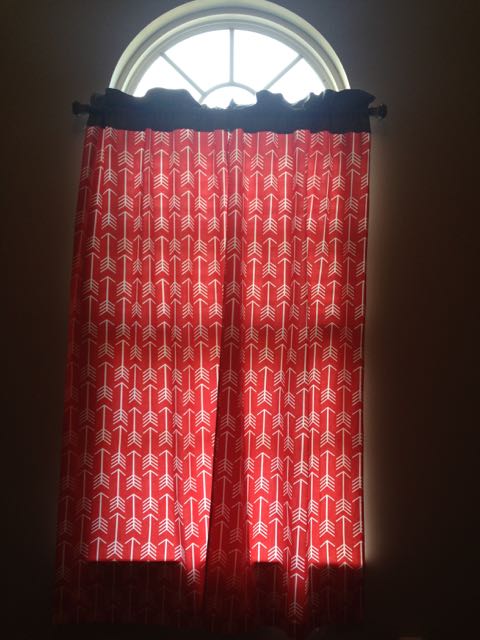
This dresser was my brothers when we were little. It has been in my stepdad’s shop as his tv stand for the past few years. It looks like a hot mess here, but you will be impressed to see what it looks like now. Troy sanded it down and we cleaned it up. I wish we would have gotten a picture of it sanded, but we were too excited to start painting!Look how beautiful it turned out! That chalk paint is some amazing stuff and it is just the right shade of mint! I am using this as my changing table, and on top is my changing pad cover that I sewed when Grandma Bloesser was here last week. Too adorable! I love it! And look at that beautiful accent wall! We even used the same knobs, just spray painted them with some metallic gray spray paint.Here are the adorable coral arrow curtains my grandma and I whipped up! They are the perfect touch!Here is my hot air balloon crib sheet complete with our ruffle crib skirt and teething rail!
A huge shout out to my mom for buying us this beautiful crib! It is so beautiful and we really appreciate it! I can’t wait to get that baby in that crib…Hurry up June!!! Also, thank you Troy for all your hard work sanding that dresser and painting the nursery. Thank you grandma for helping me sew all the pretties for Avery’s nursery! As you can see, grandma and I were super busy sewing this week! I will have tutorials on some of these things coming up on the blog over the next few weeks, so check back! I am so excited to get in there and start adding all the special touches!
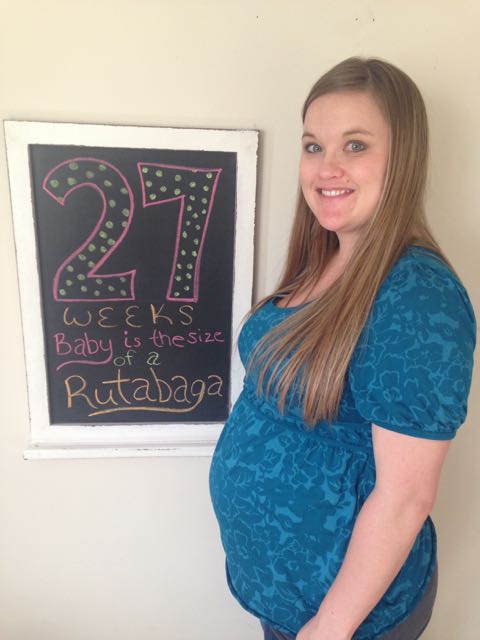
27 weeks this week! I am really starting to feel those swollen feet!Alex sporting the “sympathy belly” at our childbirth class. He said it really pushed on his bladder! Well at least they made them feel a part of it!
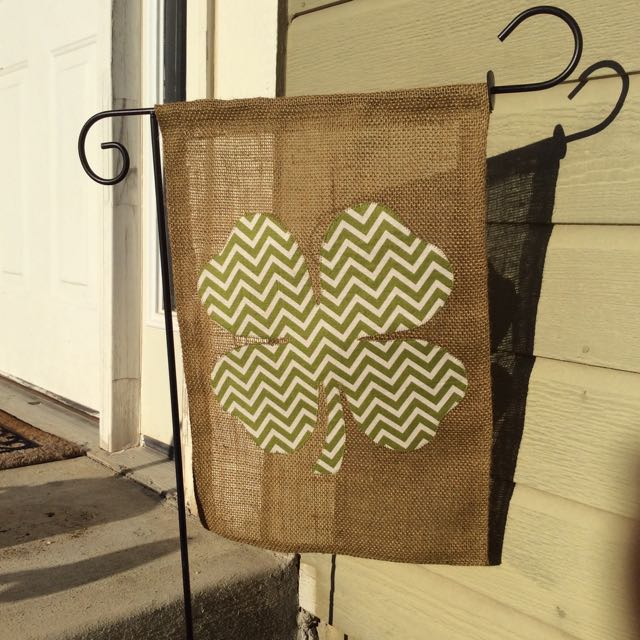
So my Grandma Bloesser gave me the cutest little garden flag for Christmas this year! I have always wanted one, and it looks too perfect in our rock garden in the front of the house. After the snowy weather started to fade away, it was time to replace my cute little snowman flag for something more “in season”. I looked online for new flags, but there were not any for Valentine’s Day that were screaming “Buy ME!” So I decided to take matters into my own hands…
This was my first attempt at my DIY garden flag.
I just used some left over burlap that I had from another project and some scrap fabric that I had laying around collecting dust. This project didn’t cost me anything since I just used whatever I had, which makes it even better!
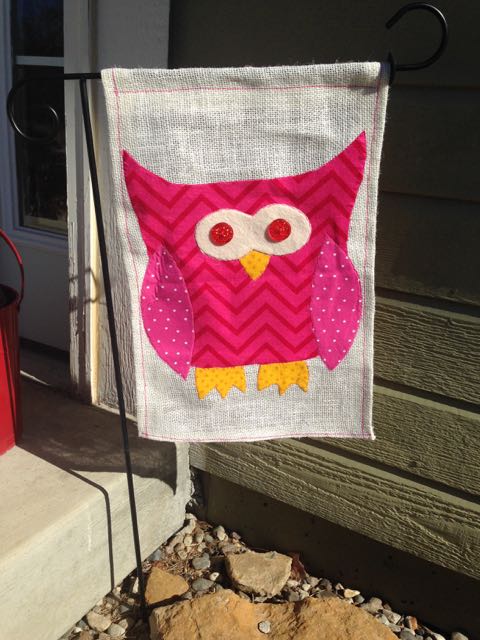
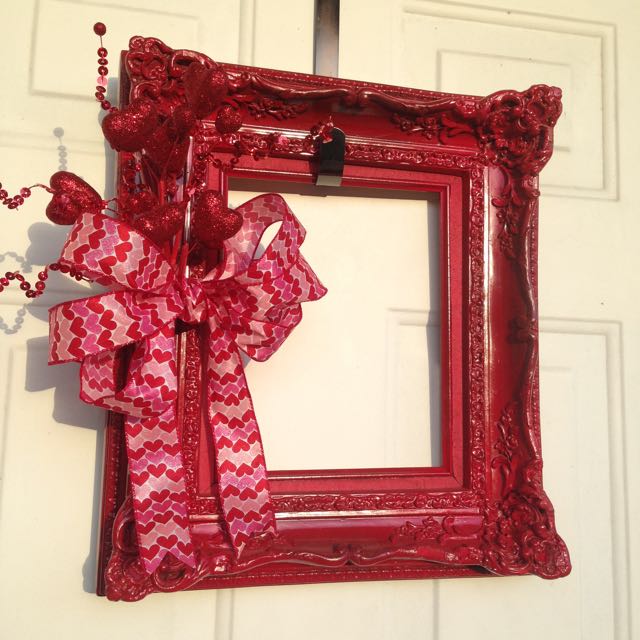
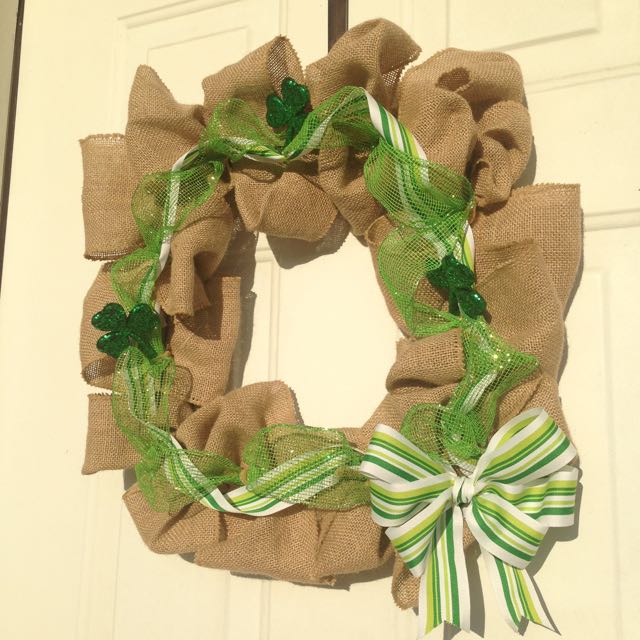
The flag looked perfect with my frame “wreath” that my mom and I made over Christmas. For Valentine’s month, I switched out the ribbon and added some glittery hearts. The flag and wreath together looked too cute for words!My March themed wreath that I did last week.
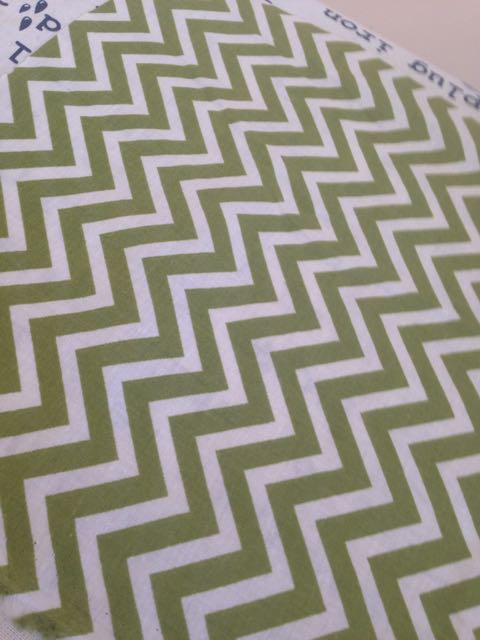
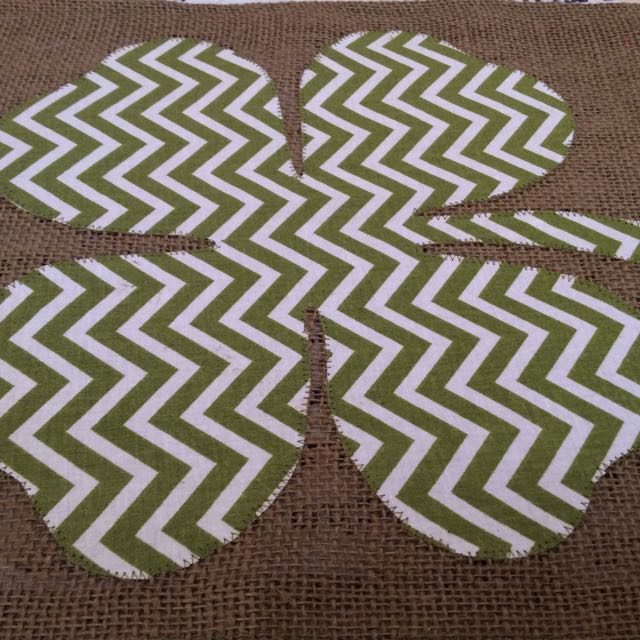
Since I changed out my wreath, my Valentine’s Day Owl flag was sticking out like a sore thumb! I decided that it was time to take another stab at the DIY garden flag and I had the perfect green chevron left over from the stockings that I made this year.
DIY 12×18″ Garden Flag
Materials Needed:
14×20″ piece of burlap
Scrap fabric
Stencil
Wonder-Under
Coordinating thread
Sewing Machine
Iron
Pins
Seam Gauge
Instructions:
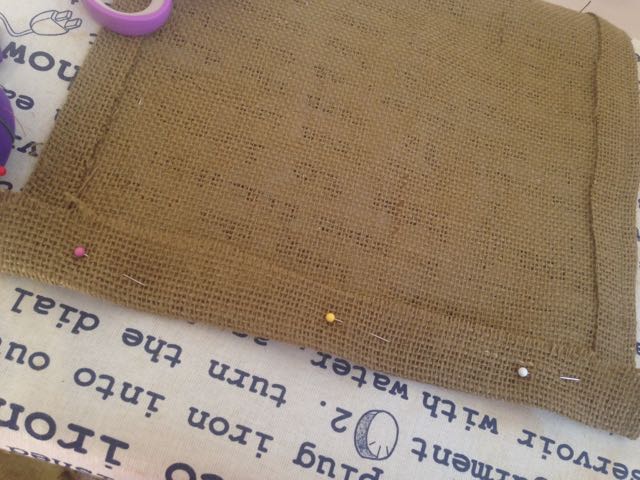
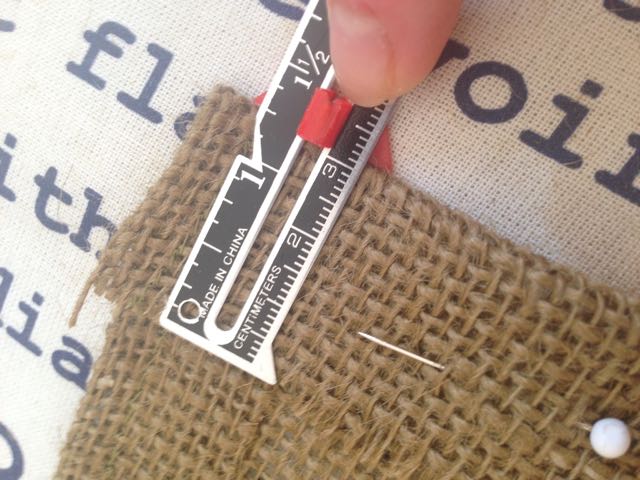
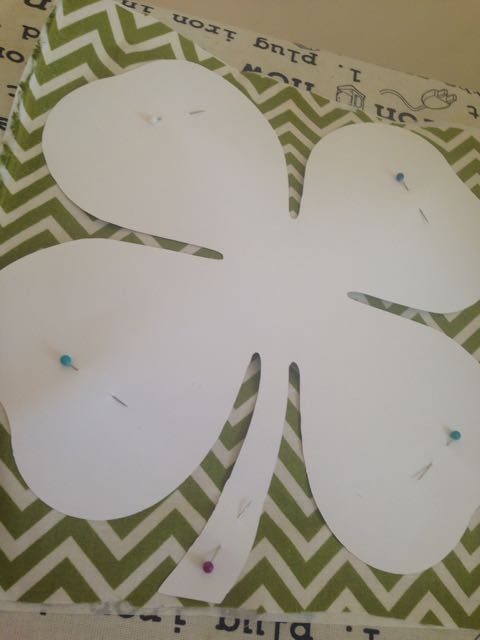
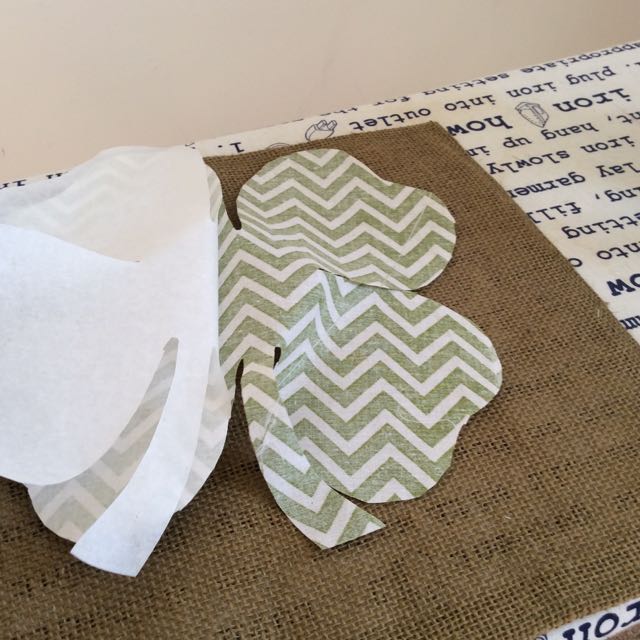
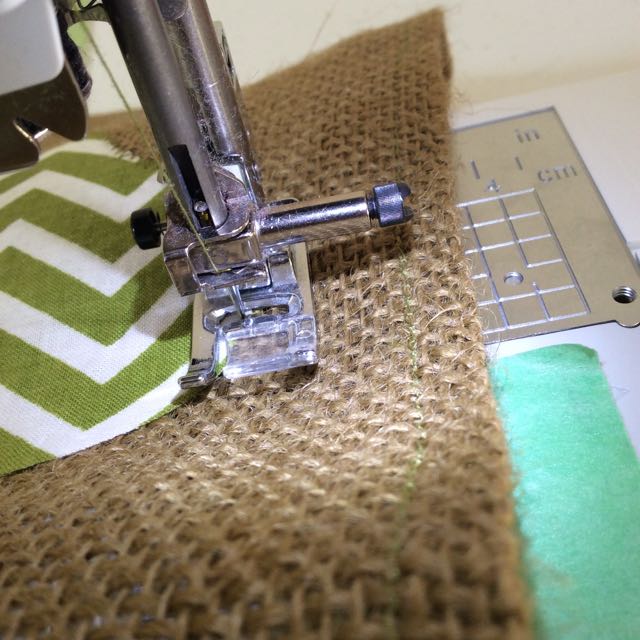
Using a seam gauge, pin and iron the long sides of your burlap at 1″. On the bottom part of the flag, pin and iron with a 3/4″ seam. Leave the top part alone for now. Sew a 1/2″ seam allowance using a zigzag stitch starting on the right long side and pivoting around the three pinned sides of your burlap.Once you are finished sewing those edges, Iron and pin down 1 1/4″ at the top. This time, you are going to be sewing with a 1″ seam allowance to create a casing for your flag to attach to the flag pole.Now that you have your flag sewn, it is time to do the applique. I used my Silhouette Cameo to cut out a large shamrock. After measuring the amount of fabric I would need, I cut out a square and a matching square of Wonder-Under.Make sure to have the paper side down on your ironing board. If you iron the wrong side, it will stick to your ironing board, and YES I learned that the hard way! Using an iron, place the Wonder-Under with the sticky part up towards the wrong side of the fabric. Iron together.Once you have ironed the Wonder-Under on the wrong side of your fabric, you need to pin your stencil to the fabric and cut it out.After you have cut out the pattern, remove the pins and peel away the paper from the Wonder-Under.Position the piece however you would like it on your flag and iron it down. Now get to your sewing machine and set your machine to a zigzag stitch. Using the middle of your presser foot as a guide, zigzag around the entire applique slowly making sure that the stitch goes right on the outside of the applique. Make sure to take your time. I went much slower on this one as my owl on the last flag was not as neat as I would have liked it to be.All stitched up! This one looks much better than the Valentine’s Owl. I think these appliques take some time to master! I am already thinking an Easter Egg for April!It looks pretty good if I must say so myself!
My grandma makes the most amazing baby blankets and she taught me how! Every time my mom needs a gift for a shower, she asks her to whip one up. They turn out so soft and cozy! Little did she know how much work they are! They are simple, but time consuming. Nonetheless, they are the perfect gift for a new baby. They are also a bit bigger than a traditional baby blanket, which is something I really like about them.
Here are a few that I have whipped up for a few friends of mine:
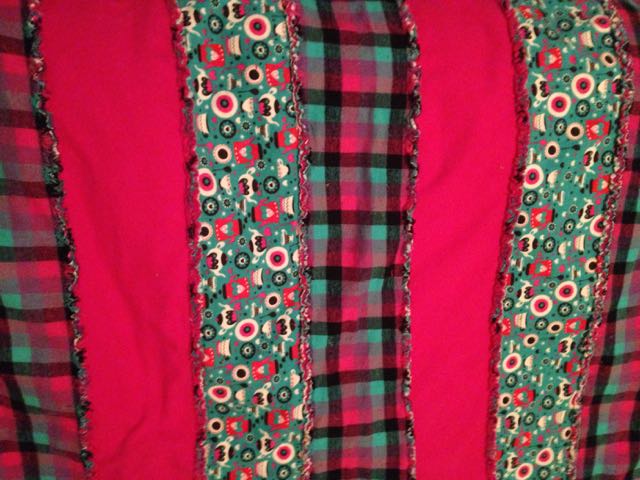
This is the first one that I did. This was for my friend Ashlee’s little bundle of joy, Lennyn!My cousin Hope had a little handsome little boy named Dakota and she was going for a Mossy Oak and teal theme!
Materials:
3 different flannel fabrics that go together: 1 yard each
Scissors
Rotary Cutter & Mat
Sewing Machine
Thread
Color Catcher
Lint Roller
Instructions:
The first thing you need to do is cut 7″ strips of fabric. To do this, iron your fabric in half the way it comes off the bold. This helps you cut the strips easier because it is folded. Using a rotary cutter, cut 7″ strips on the fold of the entire yard of each fabric.
After getting your strips cut, iron each piece to get the middle fold out. Now, you need to place the strips in the order you like for the front and back of the blanket. You can put the same pieces together, or piece them differently on the front and the back. The front pieces are going to be the part of the rag quilt that is frayed. The inside will not be frayed and that is where you wrap the baby! I usually figure out how I want the front first and then the back.
I usually line up the front part of the blanket on top and the back side on back. Depending on how wide your fabric is, you will either get 7 rows of strips or 8.
Take the first strips of the pattern for front and back and put them together. Since it is flannel, usually both sides are the same so it doesn’t matter which way you lay them together. If you have a flannel that is only printed on one side, put the wrong sides together. Pin all the way on one side. Sew a good 1/2″ seem all the way down one side.
I usually make sure to pin the pieces down all the way down the side. I find when I don’t pin, the pieces tend to shift a bit making them uneven.
Next, place the two pieces your just sewed on bottom, with the back side up. Place the next back strip and the front piece on top.
Put the first side facing with the back piece up and pin the next back side piece with the front side on top. This will make the back pieces have a nice clean seam with a 1/2″ seam that you will cut to fray on the front of the blanket.This is what the back of the blanket looks like after sewing the first strips together.This is the front of the blanket that you will cut to fray when you are done!On your 2nd pair of strips, you need to place the back strip to the last back strip and your front strip on top.
Basically, you keep adding to the last pair of strips all the way until you run out of strips. REMEMBER: Make sure that your back strips are facing each other with the new front strip on top. When you are pinning, you should be pinning on the top strip because that is the one you will cut to fray. When you have all the pieces together, you will sew the last two strips together and use your rotary mat and cutter to even up the sides. Don’t worry about cutting through the sewed parts. When you have squared up the edges, you need to press the seams flat and sew a 1/2″ seam all the way around the blanket.
After you have sewn the seam all the way around the blanket, you are ready to grab your scissors and sit down in front of the tv, because the next part takes some time! I am not sure why I didn’t get a picture of this, but you are going to cut every 1/4″ all the way down the rows and outside of the blanket. Take your time and don’t cut the seam, just close to it!
After you have cut down the rows and on the outside edge around the blanket, you are ready to wash! My grandma always recommends throwing a color catcher sheet in, just in case so if your fabric bleeds, it doesn’t ruin your final product. Wash the blanket and dry it being ready to clean out that lint trap a few times! When it rags, you will have little bitty threads everywhere! The blanket will pill a bunch, so I suggest getting friendly with your lint roller and be ready to use a ton of sheets to get them all! After you are finished, you have a beautiful rag quilt for baby!
I almost kept this one for myself, as we had just found out we were having a girl! The teapots were so cute, but they already had a home snuggled up to my friend Emily’s beautiful baby girl Emma!I am in the process of creating a post about doing one of these rag quilts in squares instead of strips. It is a lot more work, but the result is darling! Check back for a tutorial on it soon!
I remember the first time I tried guacamole. I was in college working at Applebee’s and just got a wild hair to try something new! Boy, was I in for a surprise! It was DELICIOUS! I have always been a bit of a picky eater when it came to certain things. It is amazing how much your taste buds change as you get older. (I think part of it is just getting the courage to try something new!) I did not have any desire to try guacamole based on the mere fact that it was green and could not possibly be good.
I am glad that I got the courage to try something new that day and will forever pile on the guacamole any time I have the chance! Alex and I eat avocados for almost every meal. He loves my tuna wraps and a half an avocado is the secret ingredient. Just mix it with the tuna and some black pepper and you are good to go!
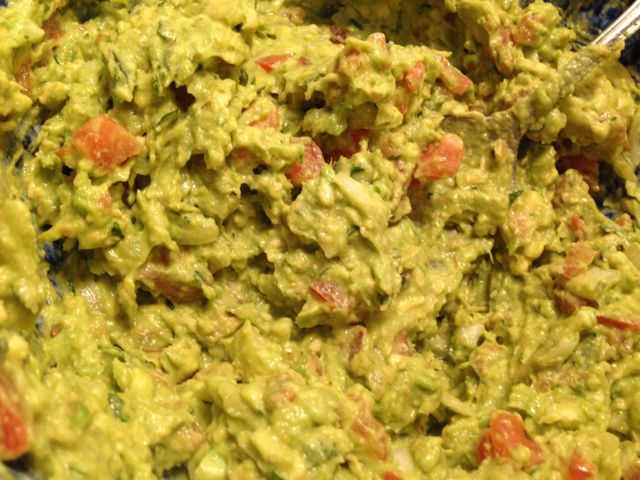
Alex found this recipe online and we have made a few tweeks to it. It was adapted from Alton Brown’s guacamole recipe. We are big fans of garlic at my house, so I always toss in a few more cloves than a recipe calls for. I also added some fresh cracked pepper to kick it up a notch. I have been told at many get togethers that I will be allowed back as long as I bring a big batch of guacamole! This recipe is so easy and irresistible!
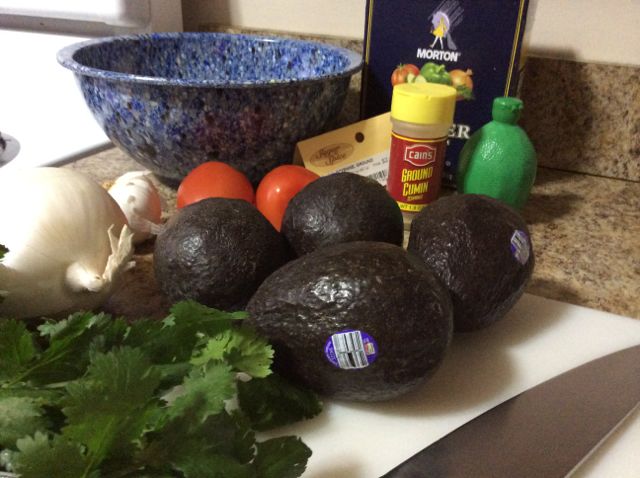
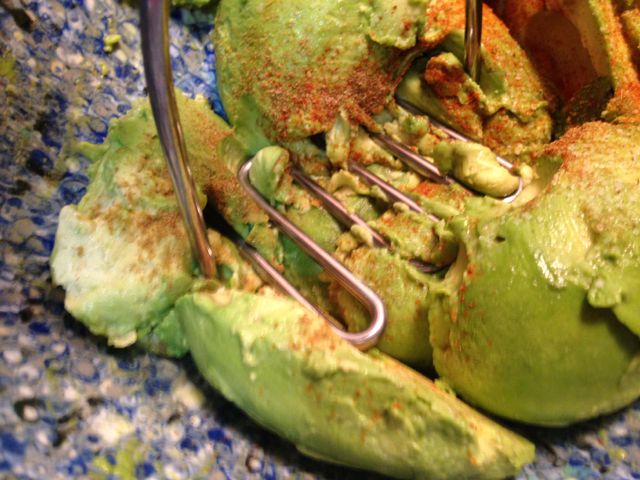
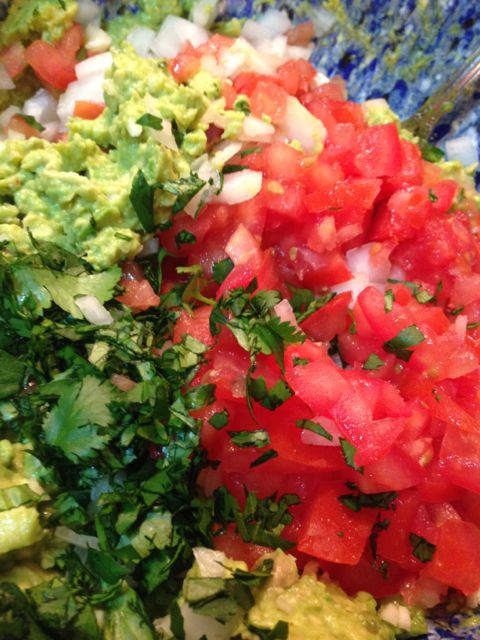
The lineup of ingredients.After halving the avocados and giving them a coat of lime juice, add the cayenne, cumin, salt, and pepper.Using a potato masher, mash up the mixture.Add the fresh chopped onion, garlic, tomatoes, and cilantro by folding it in.Let the guacamole set at room temperature for about an hour before serving.
Ingredients:
4 avocados
1 fresh lime
1/2teaspoon kosher salt
fresh cracked pepper to taste
1/2teaspoon ground cumin
1/2teaspoon cayenne
1/2medium diced onion
3 diced roma tomatoes
1 tablespoon chopped cilantro
3 cloves minced garlic
Directions:
After halving the avocados and removing the pit, place the avocado in a bowl. Squeeze the fresh lime on top and toss them around a bit. Using a potato masher, mash the avocados. Next, add the salt, cumin, cayenne, and black pepper stirring well. Fold in the garlic, onion, tomatoes, and cilantro. Let the guacamole sit for an hour or so at room temperature before serving.