Posted on Leave a comment

Avery’s Hot Air Balloon Nursery

I have been working so hard on Avery’s nursery since the second we found out we were having a girl.  Maybe even right after we found out we were pregnant because you all know how obsessed with Pinterest I am!  I started off with just a color scheme, as I wanted something classic that she could grow into without too much of a “theme.”  Then I started growing obsessed with hot air balloons.  I think over all it turned out not too “themey” and quite beautiful if I must say so myself!

I used Pic Collage to make a dream board for the room.

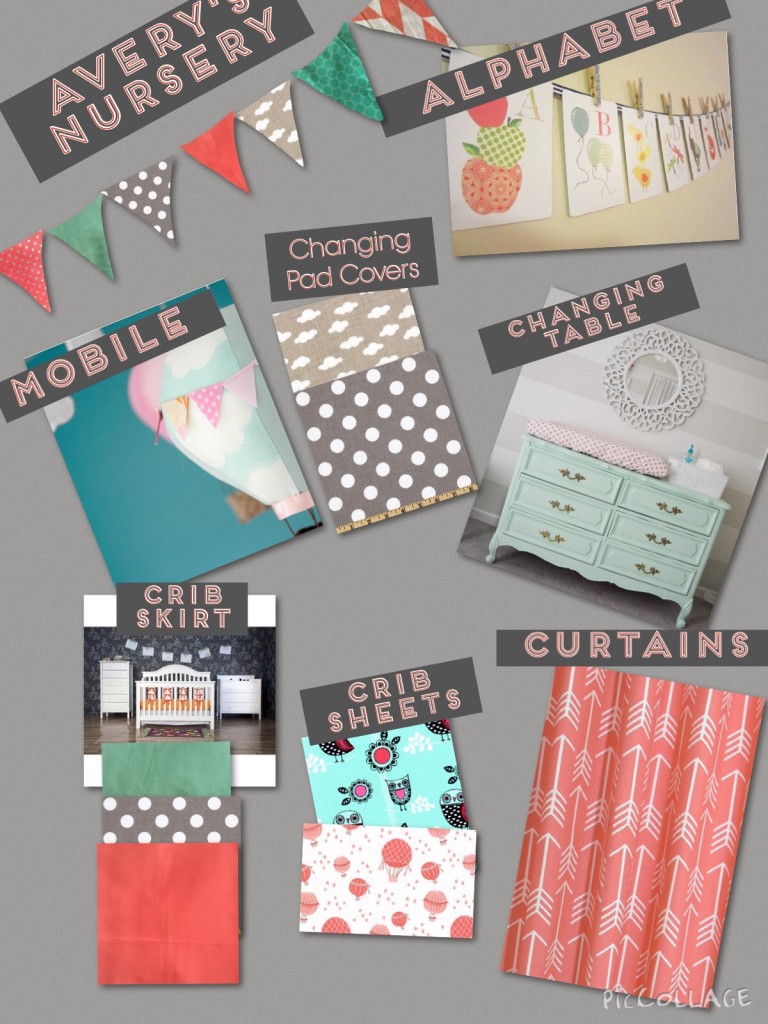
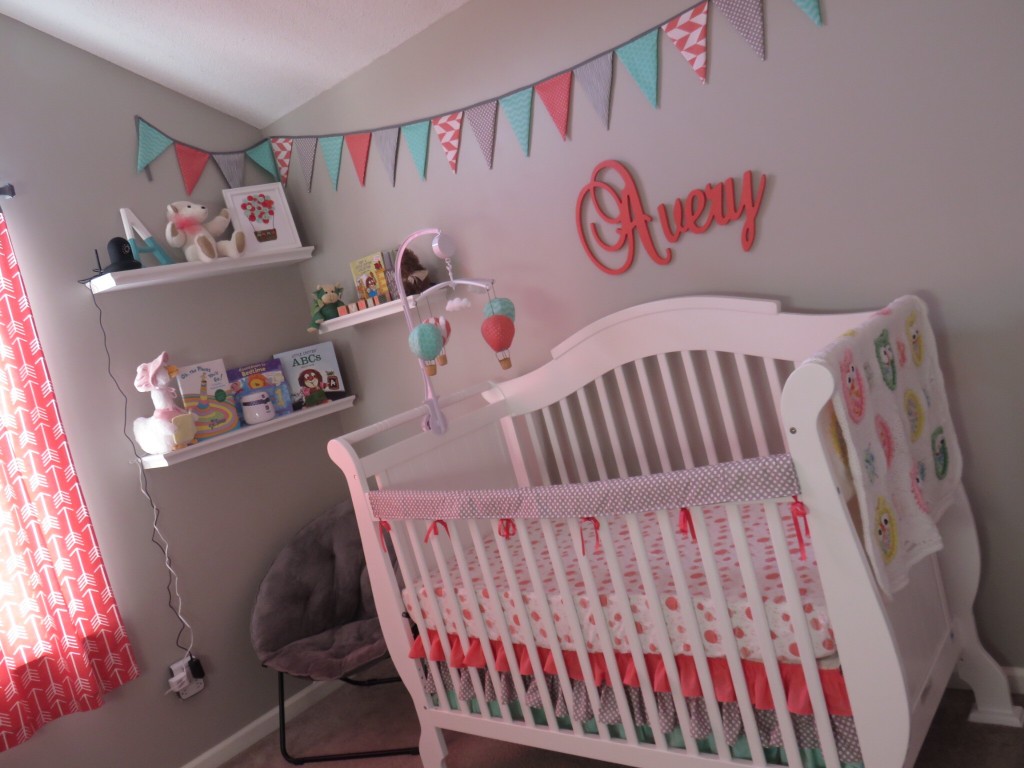
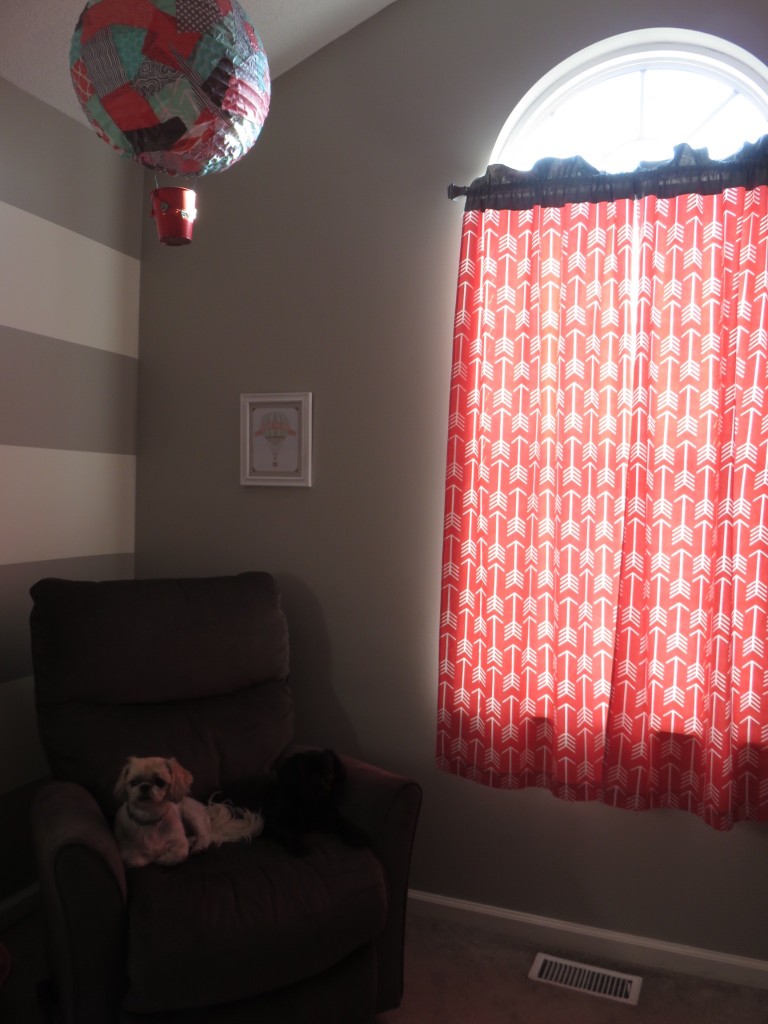
I decided on a mint, coral, gray, and white color scheme that would be the baseline of the nursery.  I remember when I told my husband that I wanted the walls gray with one accent wall of either gray and white stripes or chevron.  He thought I was crazy along with my stepdad, mom, and grandmother.  I kept telling them to relax and go with my vision.  My grandma was afraid I would get too dark of a gray and that it wouldn’t be cheerful enough for a baby.

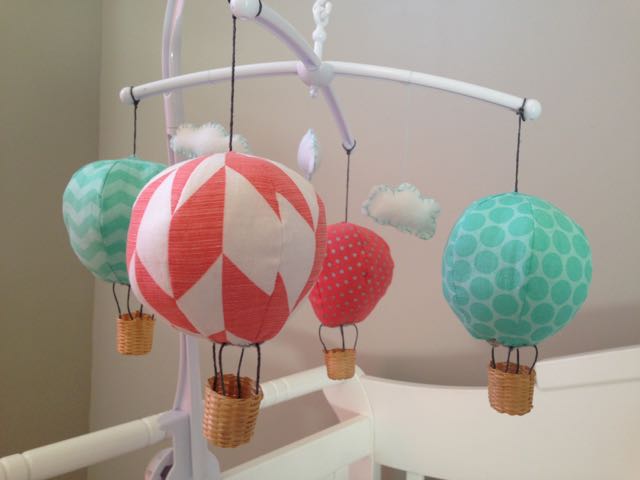
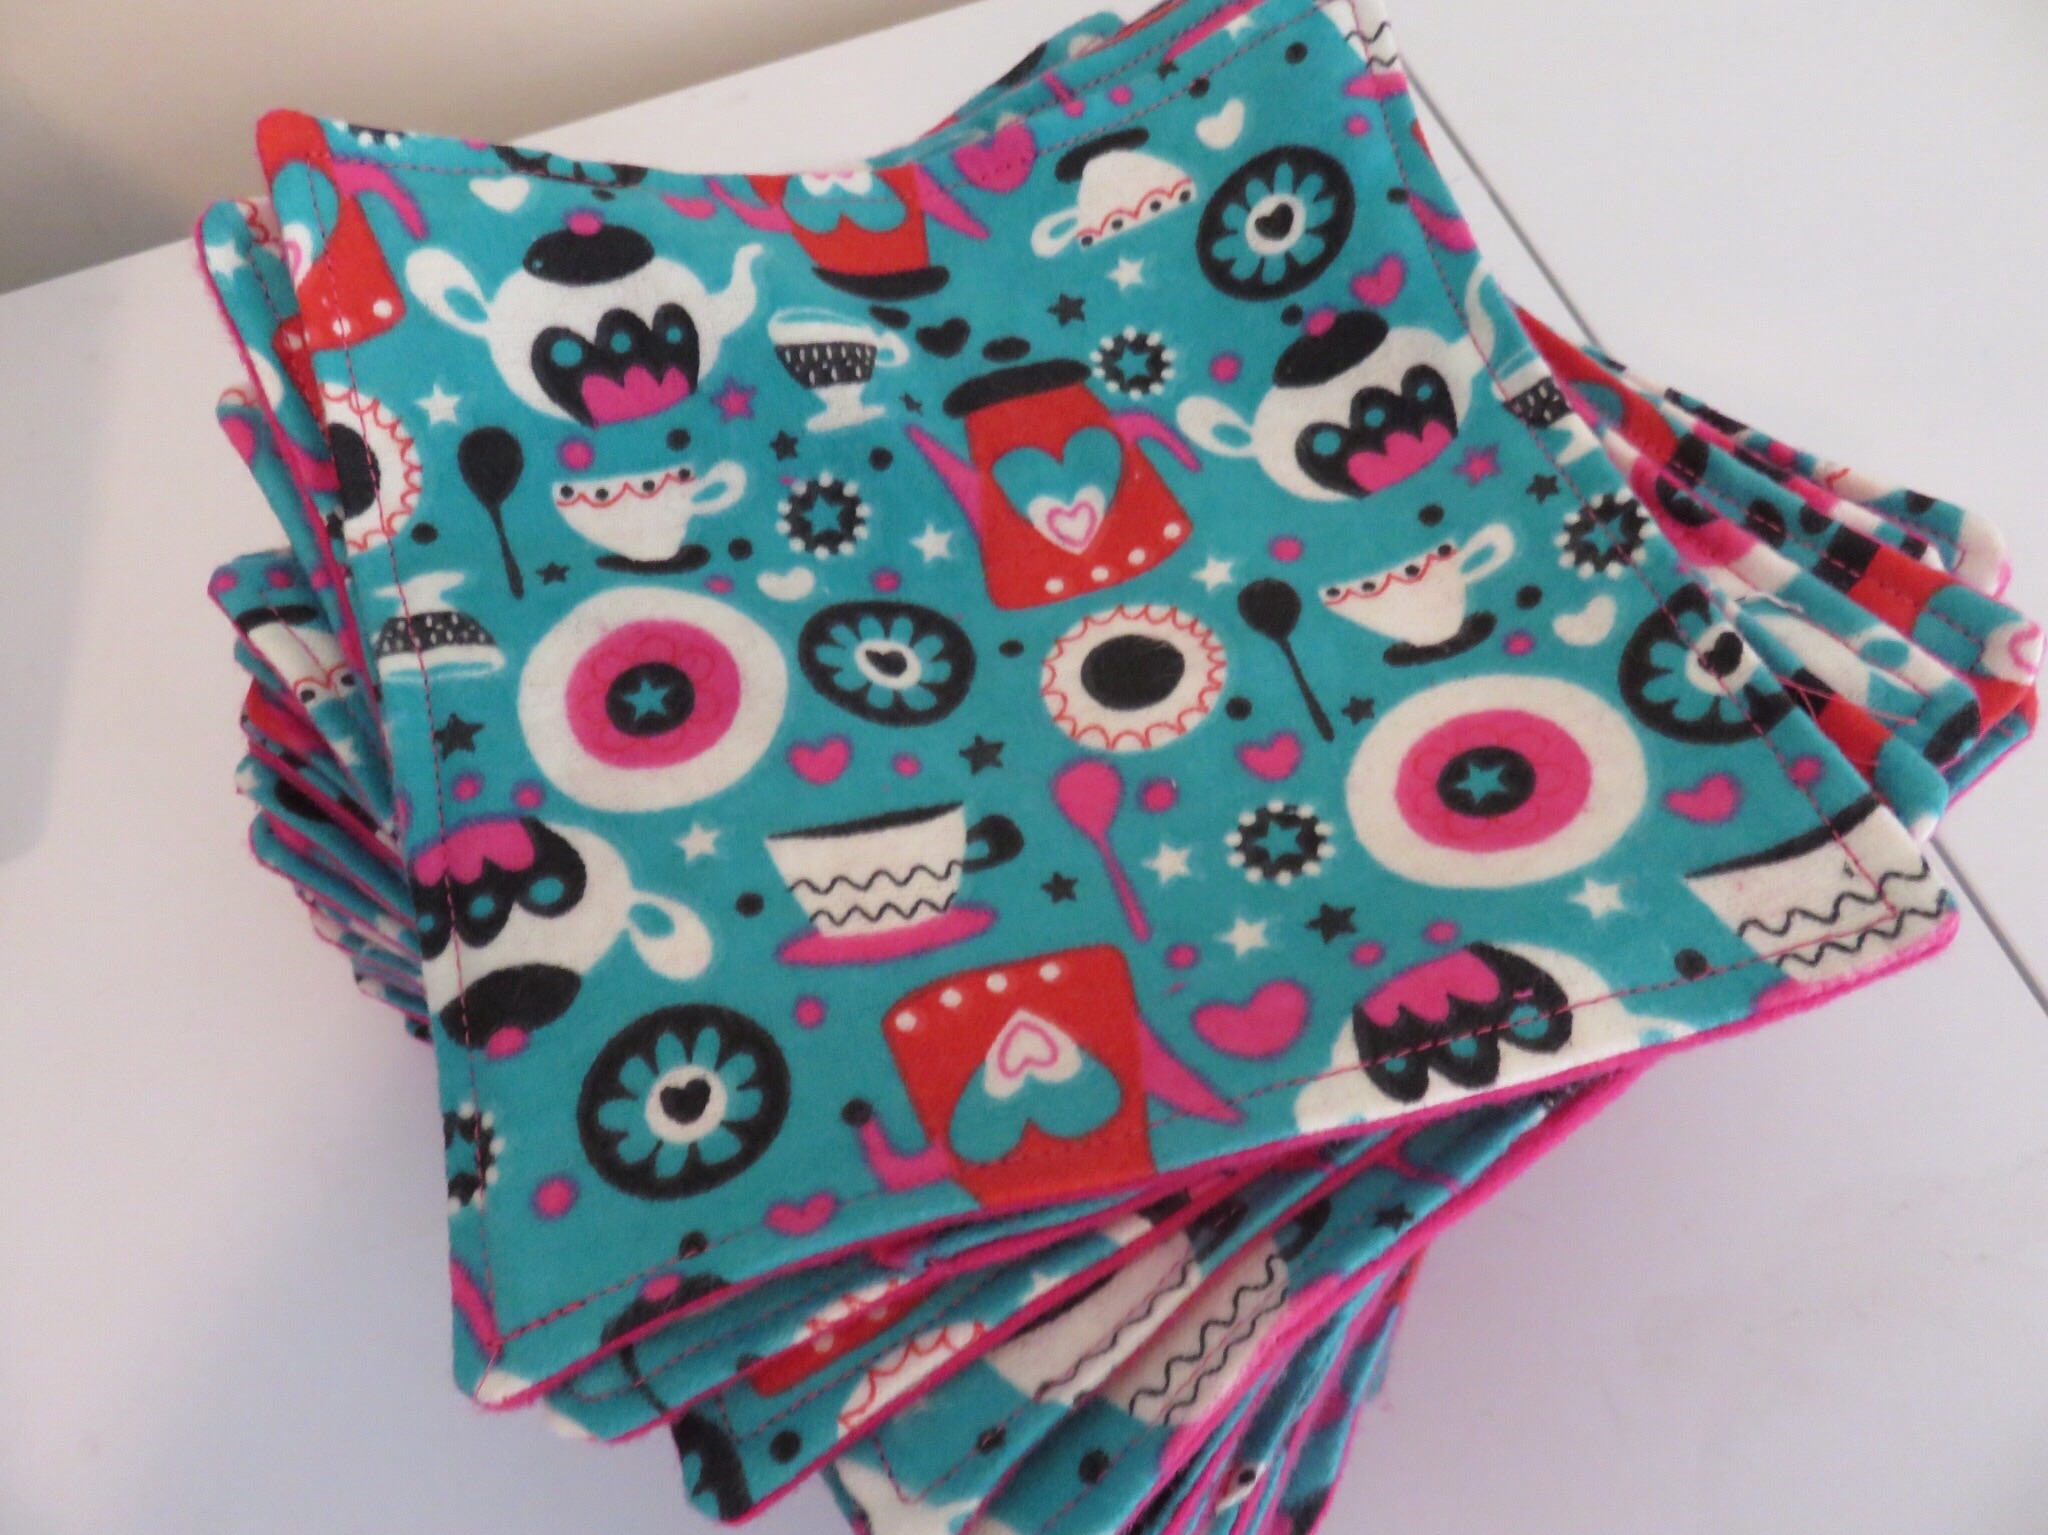
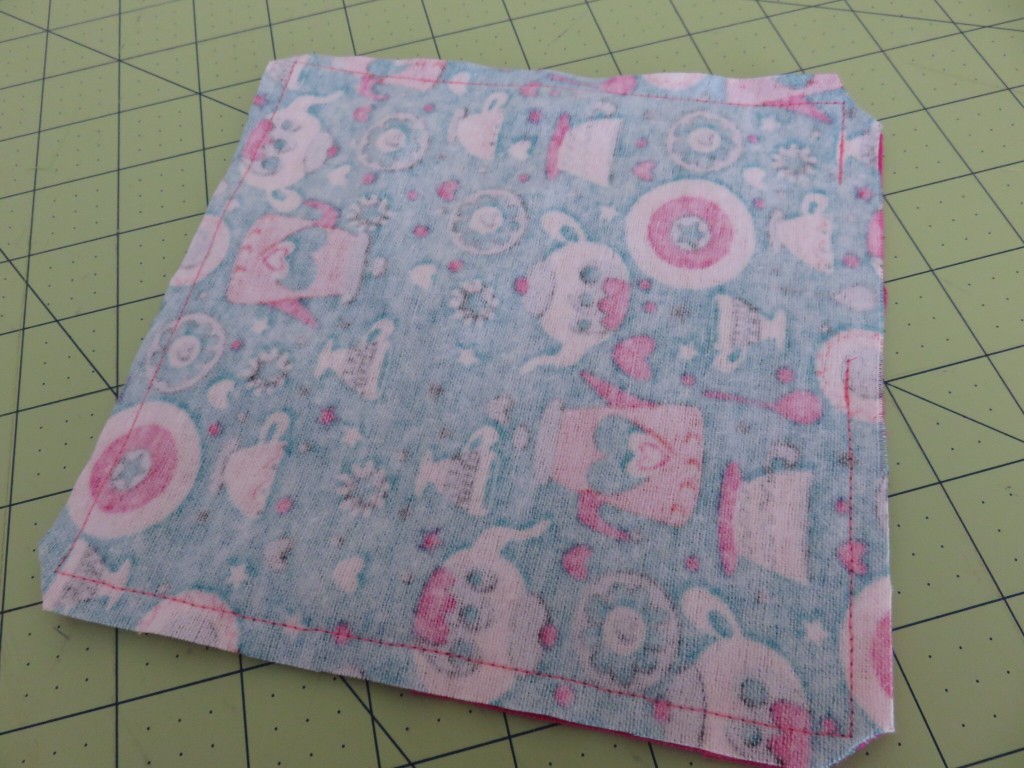
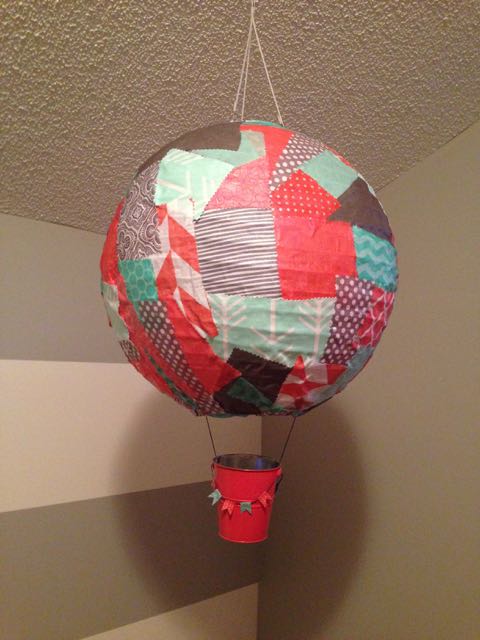
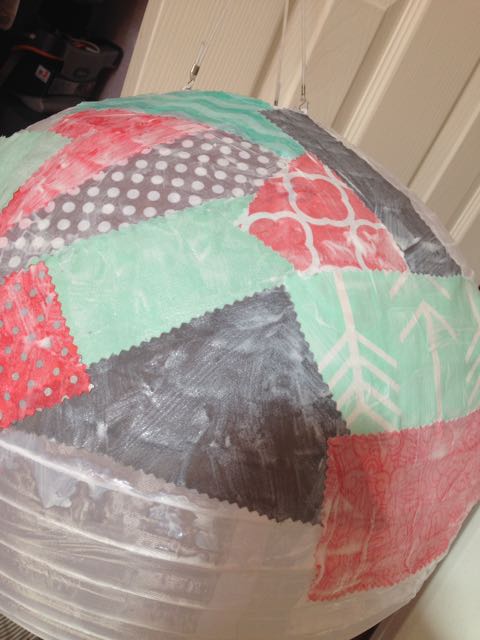
My Grandma Bloesser came down over my Spring Break and helped me sew things for the nursery.   I wanted to do everything myself, so we had quite the list of things to get done over her week stay.  I am kind of a DIY Queen, so I couldn’t just find a store bought bedding set, especially when I found the perfect hot air balloon material that would make the most adorable sheets!

Click here to check out my tutorial on DIY Crib Sheets!

In addition to the crib sheets, we also created a beautiful three tier ruffle crib skirt that was an absolute nightmare to make!  I hate ruffles!  Grandma had to swoop in and save the day on this one. We tried adapting the pattern to go with the crib because the sides are solid and we didn’t need it to go all the way around.  Needless to say I threw my hands up with that one and didn’t even attempt my own tutorial on it because it was a pain.  It turned out gorgeous, but I never want to sew another ruffle again!

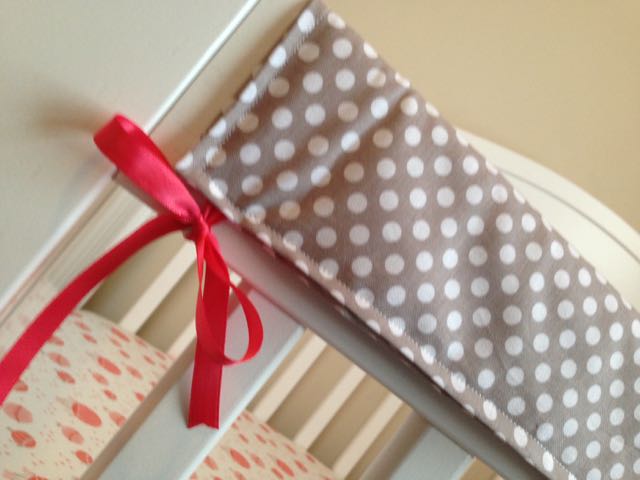
As much as I love crib bumpers, they say not to use them because of suffocation risks, but I had found some pins on DIY teething rails.  Once baby is big enough to stand up in the crib, they are usually teething and tend to chomp on the rail of the crib.  This leaves dents in the crib rail, along with the potential risk off paint chips in baby’s mouth.  I decided that teething rail was a must!

Click here to check out my tutorial on a DIY Teething Rail.
I just love how the whole room just comes together!
Love the coral arrow curtains we made.
Love the coral arrow curtains we made. Chloe and Mia are keeping the rocking chair warm for our next feeding!
Click here for my tutorial on how to creat a patchwork hot air balloon!

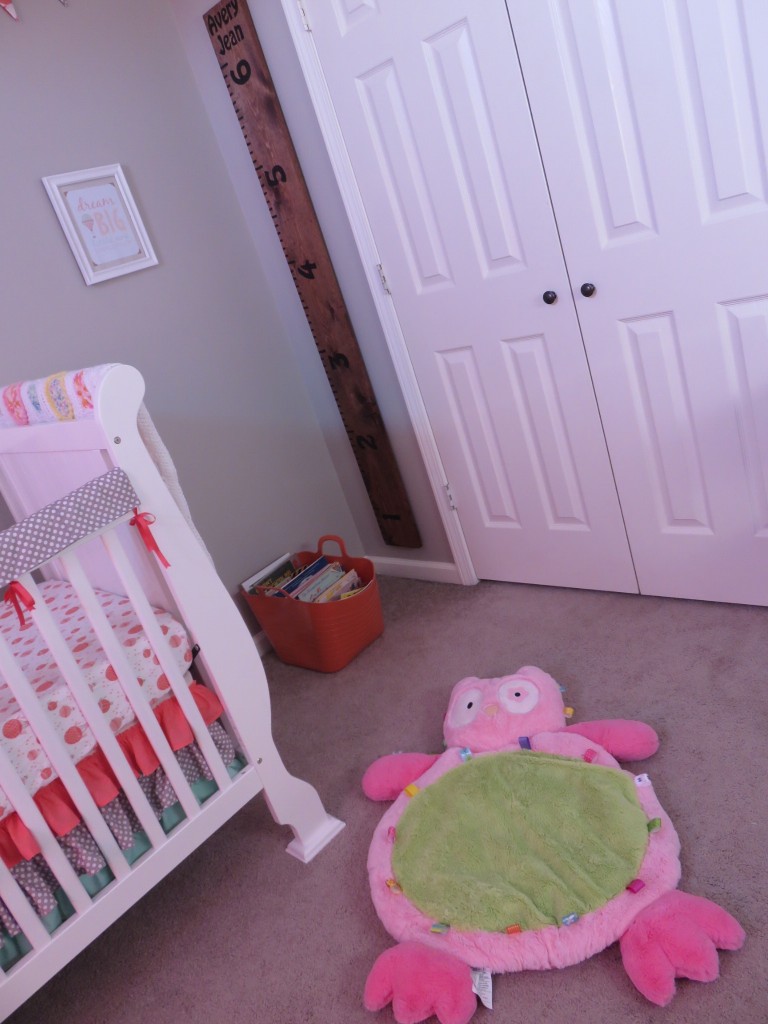
I wanted some shelving in the corner of her room.  Originally, Alex was going to build me some shelves, but I had my heart set on some floating shelves.  After doing some research, we decided it would be easier to find some already made ones.  We spent one afternoon at Ikea and the ones that I liked there were way too long.  We almost got them anyways and I am glad we didn’t because we found the perfect ones at Target!

Love the shelves.  We put the baby monitor camera at the top overlooking the crib.  I also have my brother Karlton's 4H cow overlooking her crib.  It means a lot to me to have this in her nursery.
Love the shelves. We put the baby monitor camera at the top overlooking the crib. I also have my brother Karlton’s 4H cow overlooking her crib. It means a lot to me to have this in her nursery.
Click here to see my tutorial on how to create this hot air balloon artwork!

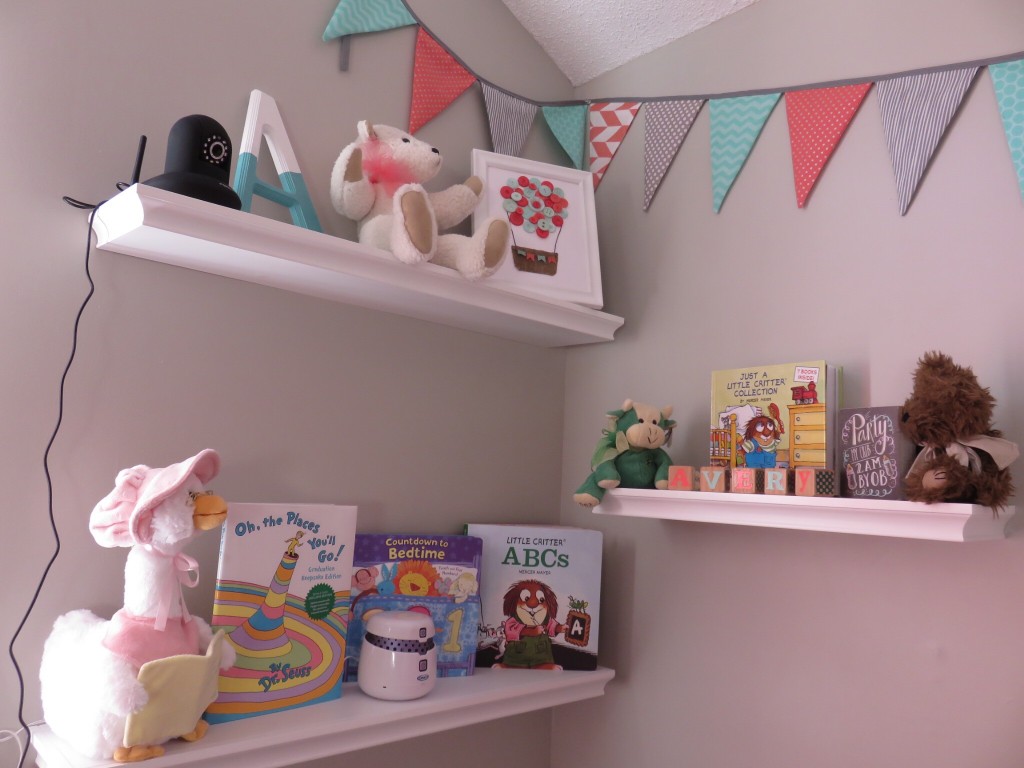
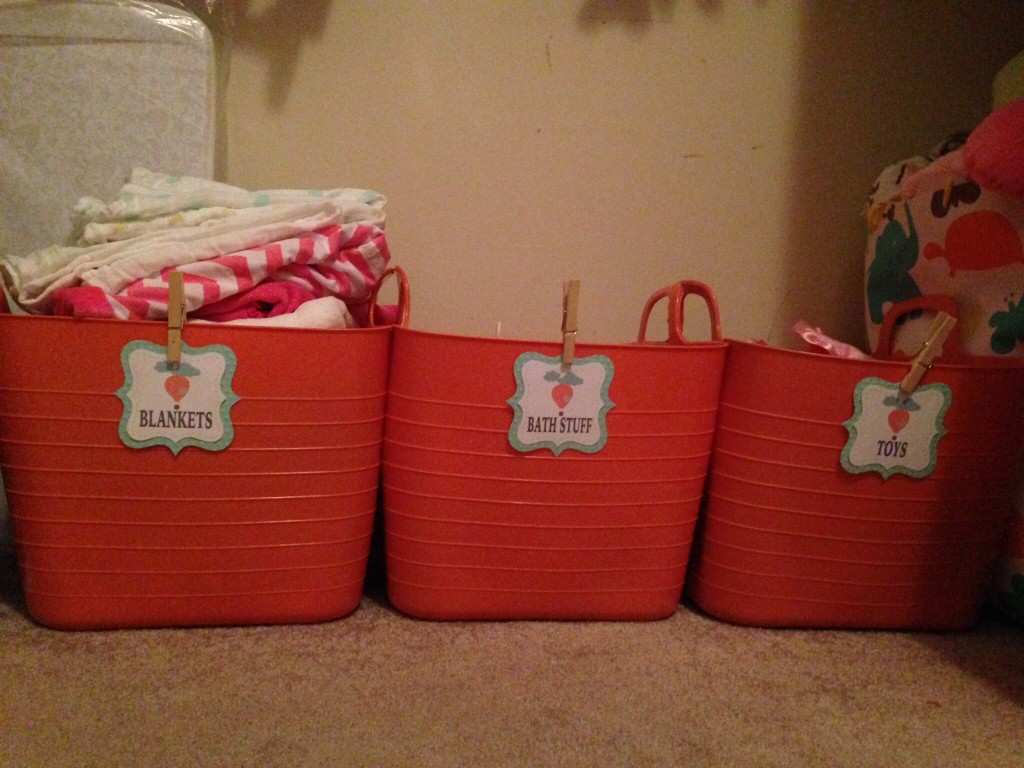
I wanted some type of bookcase in the room for her books, but Alex was afraid she would try to climb it and it would fall on top of her.  (He’s not going to be a protective daddy or anything!)  I ended up getting an extra tub from Hobby Lobby and just putting her books in one on the floor.   I figure when she is bigger, she can just grab whatever book she wants us to read from the tub and we will be good to go!

image
Avery’s reading corner
Avery seemed to enjoy the first book I read her!  I think we have a future bookworm on our hands!
Avery seemed to enjoy the first book I read her! I think we have a future bookworm on our hands!

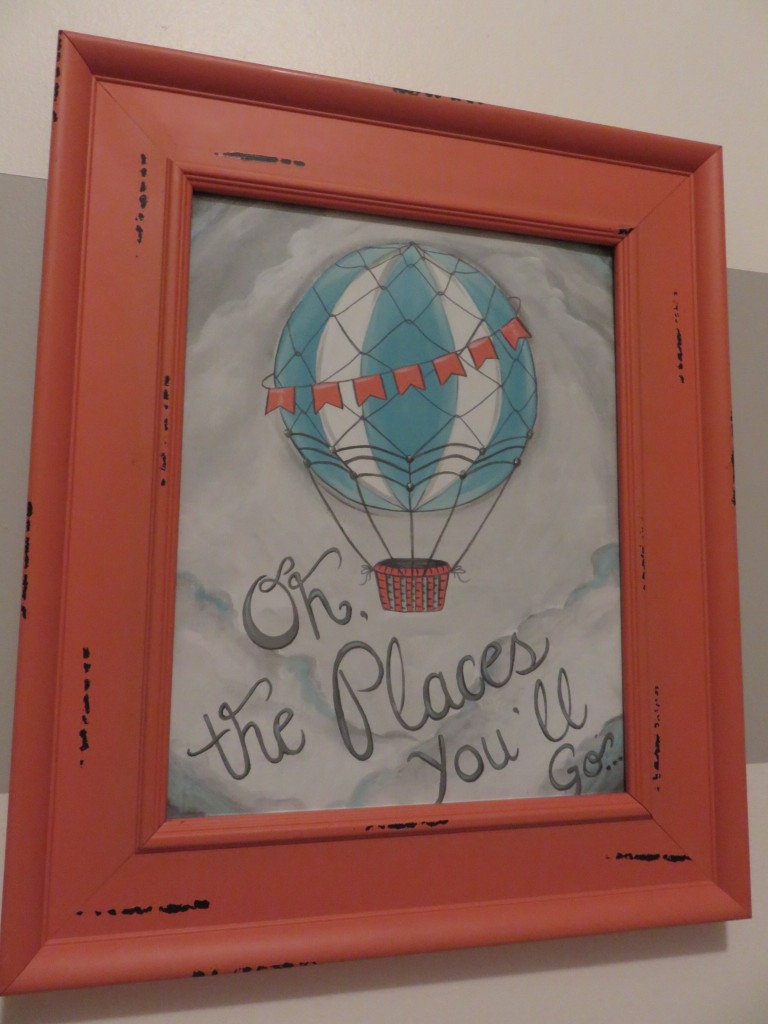
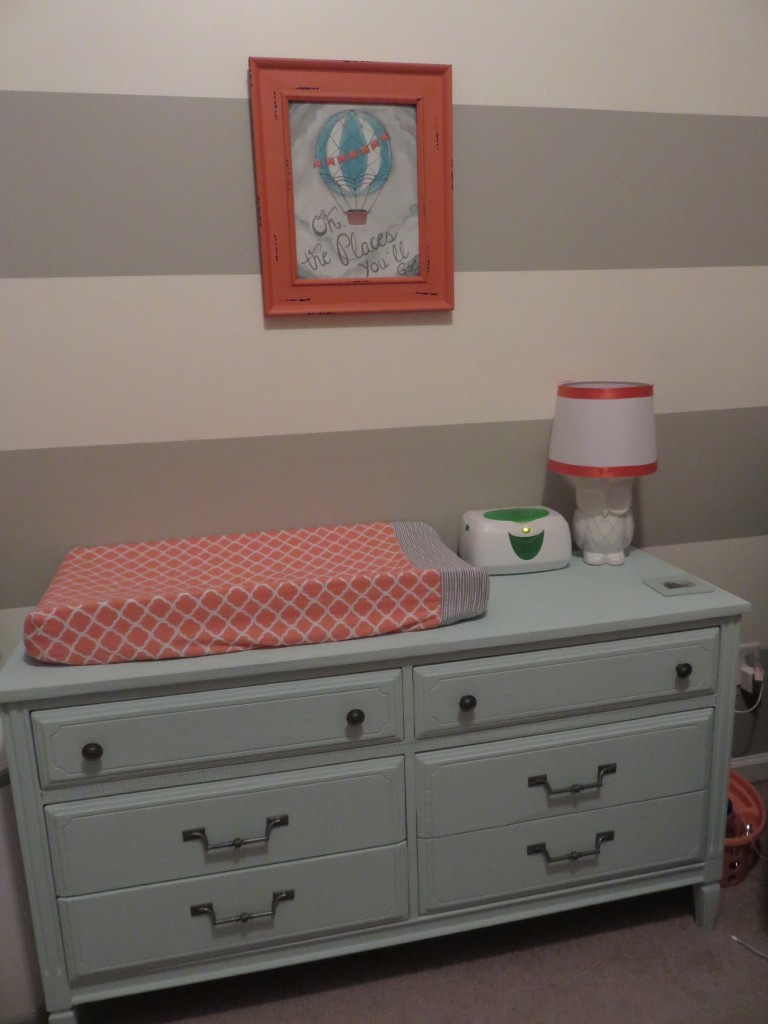
The dresser area has a special piece of artwork hanging above it!  One of my childhood friends Alisha Johann created the most beautiful whimsical hot air balloon watercolor painting!  I wanted a special quote on it from Dr. Seuss that says “Oh the places you’ll go!”  I think she totally nailed it!  I was beaming with excitement when I opened it and went straight up to the nursery to hang it up!

A close up shot!  Thank you Alisha! I love it!
A close up shot! Thank you Alisha! I love it!
Love the way the dresser/changing area turned out!
I love the pop of color when you open the dresser drawer!   Click here for the tutorial on how to line your dresser drawers!
I love the pop of color when you open the dresser drawer! Click here for the tutorial on how to line your dresser drawers!
Click here to learn more about how I made Avery's Hot Air Balloon Mobile!
Click here to learn more about how I made Avery’s Hot Air Balloon Mobile!
I am using a bar cart from Ikea for our cloth diaper storage.
I am using a bar cart from Ikea for our cloth diaper storage.  As you can see, it is diaper laundry day!
Closet storage bins!
I found the perfect storage bins at Hobby Lobby!  They matched my nursery colors perfectly!
image
More closet storage!
Avery hopes you enjoyed a tour of her nursery!


Posted on Leave a comment

DIY Cloth Wipes

So everyone keeps telling me we are crazy, but Alex and I have decided we are going to cloth diaper Avery. I am really excited! It is going to save us money and is better for the environment! I have been doing a ton of research and am ready to hit the ground running with the whole thing. Now we just need a baby!

What about all the extra laundry? I have this question all the time. To tell you the truth, we will have an extra load of laundry every 2-3 days. I don’t see that as much of a hassle as I feel like I do laundry all the time anyways…what’s an extra load twice a week?

Babies that are cloth diapered tend to have less diaper rashes and less blowouts. I will have to write an update post once we get started to let you know how it goes! There are so many groups out there as support systems and I am already getting lots of advice and we haven’t even started yet!

I decided if we are going to be washing diapers, why not make some cloth wipes to throw in as well. We can save more money by using them and they will just go in with the diaper load! There are many solutions out there that you can use with them, but I am going to just try a squirt bottle with plain water at first because many of my cloth diaper mommy groups have vouched that plain water works just fine!

DIY Cloth Wipes

Materials:

2 yards coordinating flannel

matching thread

rotary mat and cutter

sewing machine

Directions:

To start, cut 7 inch squares out of two coordinating flannel fabrics.
Sew two squares right sides together leaving about a 2" space on one side to turn them inside out.
Sew two squares right sides together with 1/2″ seam allowance leaving about a 2″ space on one side to turn them inside out.  Clip the corners before turning inside out.
After turning inside out, press and top stitch 1/4".
After turning inside out, press and top stitch 1/4″.

These were so easy and cheap too! Using 2 yards to make 2 ply wipes at 7×7″, there were exactly 30 wipes. I hit up Joann’s when they were having a sale and purchased 4 yards @ $2.79 a yard. That means I made 60 wipes for only $11.16!

The monsters were too cute to pass up!
These were my other fabrics I picked up. The monsters were too cute to pass up!

Posted on Leave a comment

Maternity Shoot

Alex and I wanted some pictures together with my baby bump before little Miss Avery decides to make her debut! Luckily, I have an amazing friend that takes good pictures, so I asked her if she would mind coming over one day and take some for us. Thank you Amanda!! (PS I had someone ask me today if you did it as a side job…just something to think about!) She did an awesome job directing us into poses and everything! So before you go out and spend a fortune on a maternity shoot, get on Pinterest for ideas of what you want and find a friend that likes to take pictures! I am so pleased with the way they turned out!

Love this one!  Minus my chubby swollen feet it is perfect!
Love this one! Minus my chubby swollen feet it is perfect!
The bendy trail really makes this picture.  Have I mentioned how much I love this trail by my house?
The bendy trail really makes this picture. Have I mentioned how much I love this trail by my house?
Heart on tummy!  Gotta love Pinterest!
Heart on tummy! Gotta love Pinterest!
This heart one is fun too.
I wish you could see my bump in this shadow more, but it turned out cute.
I wish you could see my bump in this shadow more, but it still turned out cute.
Had to bring the pups in on the fun!
This one was inspired on Pinterest.  I think it turned out cute!
This one was inspired on Pinterest. I think it turned out cute!
Family shot!
Family shot!
I found this pose on Pinterest as well.  I love it!
I found this pose on Pinterest as well. I love it!
This one might be my all time favorite.
We happened to hit the bridge at perfect sunlight here.  Amanda knows how to work that camera!
We happened to hit the bridge at perfect sunlight here. Amanda knows how to work that camera!
Love this one!
Love this one!
Love the bridge pictures.
We had a few of these, but I was bummed that I was holding the sono upside down.  I still had to share though!
We had a few of these, but I was bummed that I was holding the sono upside down. I still had to share though!  She is head down as of know so oh well!
A little flirting on the bridge!
Smooches!
Smooches!
Giving Avery some daddy kisses!
Vans on the belly!
Vans on the belly!
Love this one!
Love this one!
I just cut out some letters on my Silhouette for these.  Love this!
I just cut out some letters on my Silhouette for these. Love this!
Both of us in this one!
Can't see the bump, but love this one!
So much fun!
Love this one!
Love this one!
This one might be one of my other favorites!  LOVE!
This one might be one of my other favorites! LOVE!
So cute!
So cute!

I am so happy we took these.  They will be fun to share with Avery when she is older!  Check back for pictures of her soon!  She is due in about 2.5 weeks, but this mama wouldn’t mind meeting her a little early!!


Posted on Leave a comment

DIY Patchwork Hot Air Balloon

I have been pinning hot air balloon decorations like crazy and am officially obsessed!! There are so many good tutorials out there on how to make a hot air balloon from paper lanterns. Originally, I planned on using the left over fabrics from my hot air balloon mobile to just make 8 full panels around the lantern, but the lantern was pretty big and when I tried to trace a pattern for it, I didn’t have enough fabric left. Instead of going out and buying more fabric, I thought I would try something a little more outside the box!

I grabbed my pinking shears and started cutting out squares, rectangles, and triangles with all the left over coral, mint, and gray fabrics I have incorporated into the room. Then I grabbed my handy dandy ModPodge and went to town!  It was pretty easy but very messy!

DIY Patchwork Hot Air Balloon

Materials:

Fabric lantern (I got a big one from Ikea)

Scrap fabric cut into squares, rectangles, and triangles using pinking shears

ModPodge

Sponge brush

A bucket or basket

Coordinating ribbon or cord

Hot glue gun

Instructions:

Here is what you need to get started.  Cut scrap fabric into squares, rectangles, and triangles.
Here is what you need to get started. Cut scrap fabric into squares, rectangles, and triangles.
Layer your pieces on top of ModPodge and put a layer of ModPodge on top as well to seal it.
Add a bucket with cord or ribbon using hot glue to secure everything together.  I added some washi tape  bunting because I am obsessed with bunting!!
Add a bucket with cord or ribbon using hot glue to secure everything together. I added some washi tape bunting because I am obsessed with bunting!!